Cart
28 min read
Winter Survival in the Colorado Rockies — Part 4: Starting Fires in Snowy Conditions
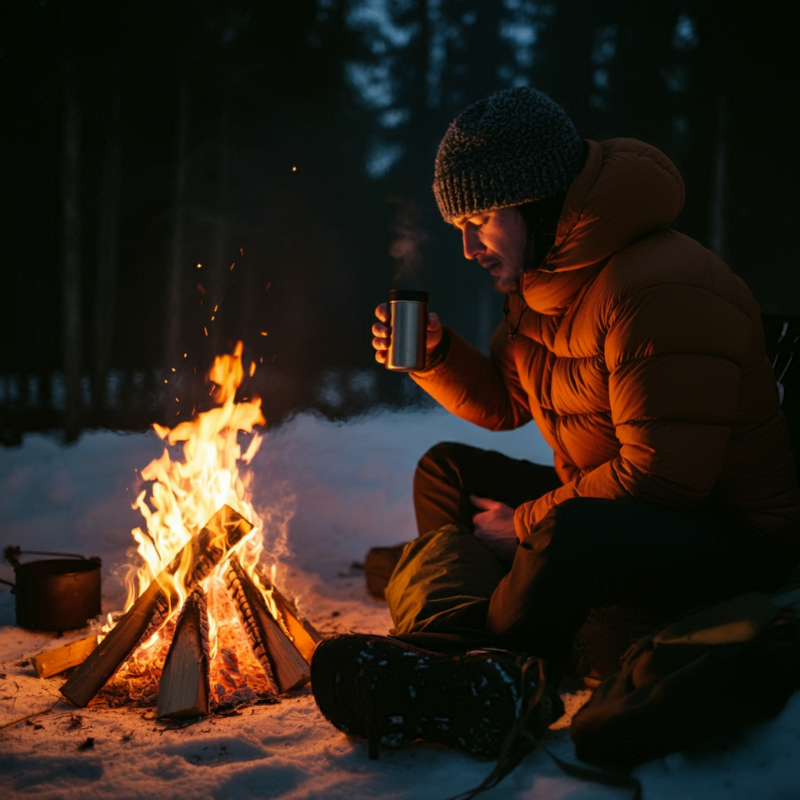
“When Snow Falls, Sparks Fly: Mastering Fire Starting in the Colorado Rockies”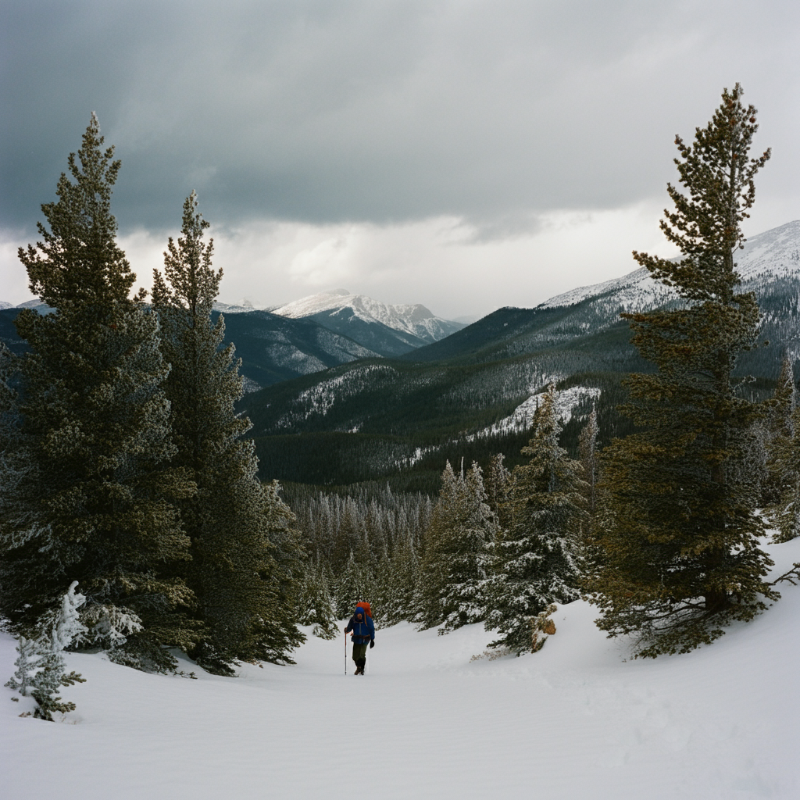
You’re deep in the Colorado Rockies, surrounded by pristine snow and towering evergreens, marveling at how the snowflakes sparkle in the sunlight. Then the wind picks up, clouds roll in, and suddenly it’s a whiteout. You’re cold, hungry, and desperately trying to strike a flame with fingers that feel like icicles. Sound like fun? Probably not. That’s why knowing how to start a fire in the snow is one of the smartest skills you can bring to the mountains.
Fire isn’t just a flickering luxury in winter, it’s a lifeline. It keeps you warm, cooks your food, dries your clothes, and might even save your life. Whether you’re a weekend adventurer or a seasoned explorer, this guide will walk you through how to spark life into a fire even when everything is cold, wet, and stubbornly uncooperative.
Why Fire Matters in Winter Survival
Fire is more than just warmth; it’s survival itself. Let’s break it down. First, there’s the obvious: fire keeps you from freezing your toes off, which is great because toes are nice to have. It also melts snow into water and cooks food so you don’t have to nibble on frozen granola bars like a mountain goat.
But fire does something deeper, it boosts morale. After all, nothing screams “I’ve got this!” like sitting around a fire you built with your own two hands. It also sends a powerful signal to rescuers. Those flames aren’t just cozy; they’re a beacon that can mean the difference between being found or spending another frosty night in the wild.
The Challenges of Fire Starting in Snow
Before we dive into how to build a fire, let’s talk about what you’re up against. Snowy conditions are a jerk to your fire-starting efforts in three main ways:
- Wet Materials: When everything is soggy, you can’t just grab a stick and expect it to light. Tinder and kindling need to be bone-dry, which is a tall order in a snowstorm.
- Cold Hands: Have you ever tried to strike a match with fingers that feel like frozen fish sticks? It’s not fun.
- Oxygen Issues: Snow can smother a fire faster than you can yell, “Why won’t this work?!” Wind can blow sparks away before they catch, leaving you with nothing but frustration.
Knowing these challenges upfront is half the battle. Now let’s gear up and tackle them.
Tools and Materials for Fire Starting in Snowy Conditions
If you’re heading into the mountains, make sure you’ve got the right gear in your pack. A little preparation goes a long way when it comes to coaxing flames out of cold conditions.
Your Fire-Starting Arsenal
Start with a reliable fire-starting tool, and no, that Bic lighter you found in the junk drawer probably isn’t enough. Ok, I lied, BIC Lighters are pure gold! I carry 2 in my pack.
- Lighters: You don’t need to invest in a windproof, refillable lighter. Go buy 2 BIC Lighters at your local gas station and throw them in your
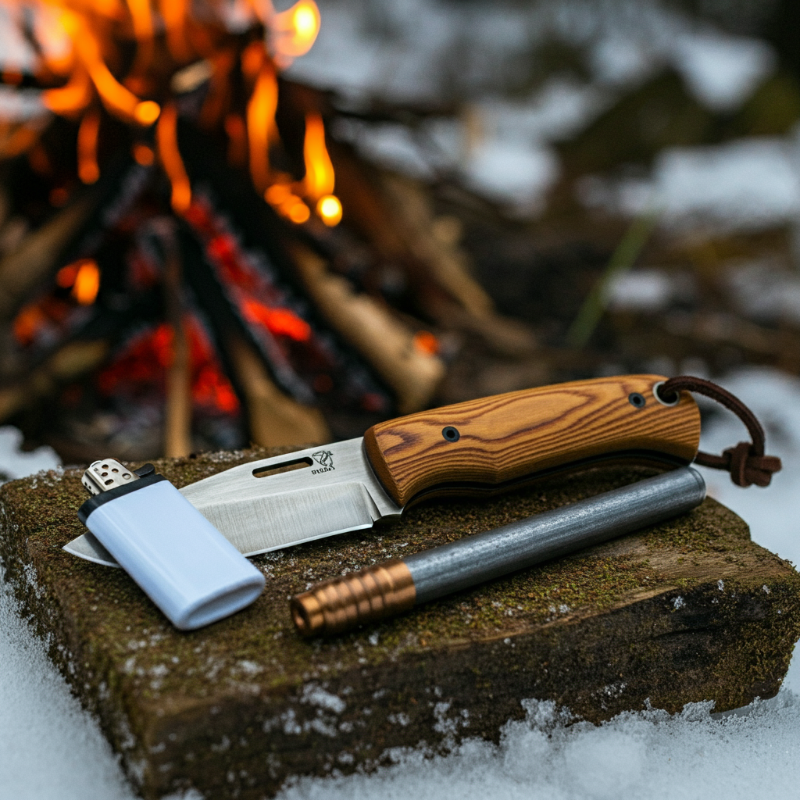 pack.
pack. - Waterproof Matches: These are a classic for a reason. Keep them in a sealed container so they’re ready when you need them.
- Ferro Rods: If you’ve never seen one, think of it as a metal matchstick that throws sparks hotter than a Taylor Swift ticket sale. They work in any weather but take practice, so get to know yours before you’re knee-deep in snow.
Pro Tip: Pimp Your BIC Before You Hit the Trail
Before heading out, give your BIC lighters a survival makeover. First, buy the ones with those fancy stickers… you know, Care Bears, unicorns, flaming skulls, tacos, or something equally fun. Pick your favorite design, appreciate it for a second, then rip that useless sticker off and toss it. Why? Because a white lighter lets you see exactly how much fuel is left. Smart move.
Next, grab your trusty multi-tool and make some upgrades:
- Remove the annoying safety guard on the thumb striker. Nobody needs that thing when you’re freezing.
- Remove the metal shield around the flame area. This not only makes it easier to use but also lets you crank out a bigger, better flame.
Now it’s time for some style and utility. Tear off about a foot of hunter-orange duct tape, then split it into a 1-inch wide strip. Wrap that tape around your lighter. Congratulations, you’ve just turned your BIC into a multi-tool.
Here’s what you’ve got now:
- A reliable lighter that works better in cold, desperate moments.
- A fire extender. That’s right, duct tape burns!
- A bright orange trail marker plus you can spot easily when you inevitably drop it in the snow.
- A mini duct tape roll to patch your gear or the hole you’re going to burn in that ridiculously overpriced REI down jacket.
Stylish, functional, and ready for anything. You’re officially a backcountry fire wizard.
Tinder: Tiny Sparks Need Tiny Fuel
Tinder is the MVP of fire starting—it’s what takes a spark and turns it into something you can build on. Pack some of these:
- Cotton Balls with Petroleum Jelly: Light like magic and burn long enough to get your kindling going.
- Dryer Lint: sigh… everyone asks me about this. My dryer lint is full of synthetic materials that melt more than burn and dog hair. Stop being cheap! Go buy cotton balls! Your life may depend on it!
- Char Cloth: A prepper favorite, char cloth catches sparks easily and burns slowly.
- WetFire Tinder: These lightweight, waterproof cubes ignite easily and burn at high temperatures, making them reliable in wet or windy conditions
Fire-Starting Aids for the Win
If nature’s being stubborn, bring some backup:
- Fire Paste: Smear it on wet wood, and suddenly it’s not so wet anymore.
- Magnesium Shavings: These burn hot enough to light stubborn kindling, even in damp conditions.
Pro Tip: Stash your fire-starting supplies in a waterproof container that’s truly up to the task. Think a small Pelican case, a screw-top plastic jar or old prescription bottle. Go for something compact and durable that seals tight, so your tinder and matches stay ready to roll, no matter what the weather throws at you.
Finding and Preparing Fuel in the Wild
You’re standing in the snow, staring at a forest full of soggy logs and icy branches. What now? The trick is to find dry fuel hiding where the snow hasn’t reached.
Dry Tinder and Kindling in a Wet World
Higher is Dryer! When searching for tinder kindling in wet conditions, avoid looking on the ground or digging in the snow, it’s a waste of time. Instead, focus on gathering materials that aren’t touching the ground. Snap dead branches off standing living trees, or look for standing dead trees where the wood is drier. These elevated sources are your best bet for dry fuel.
If you’re lucky, you might find fatwood, the resin-saturated core of dead pine branches or stumps. Fatwood is one of the rare materials that works even when found on the ground because it’s naturally resistant to moisture. Remember, when it comes to fire-starting, higher is always dryer!
Natural Tinder Options
When starting a fire in the wild, nature offers an array of materials if you know where to look. Here are some reliable options:
- Birch Bark: Nature’s fire starter, birch bark contains oils that burn fast and hot, even when damp.
- Fatwood: Rich in resin and found in pine stumps or branches, fatwood burns like it’s soaked in gasoline.
- Inner Bark of Dead Cottonwood Trees: Found on the trunks of dead
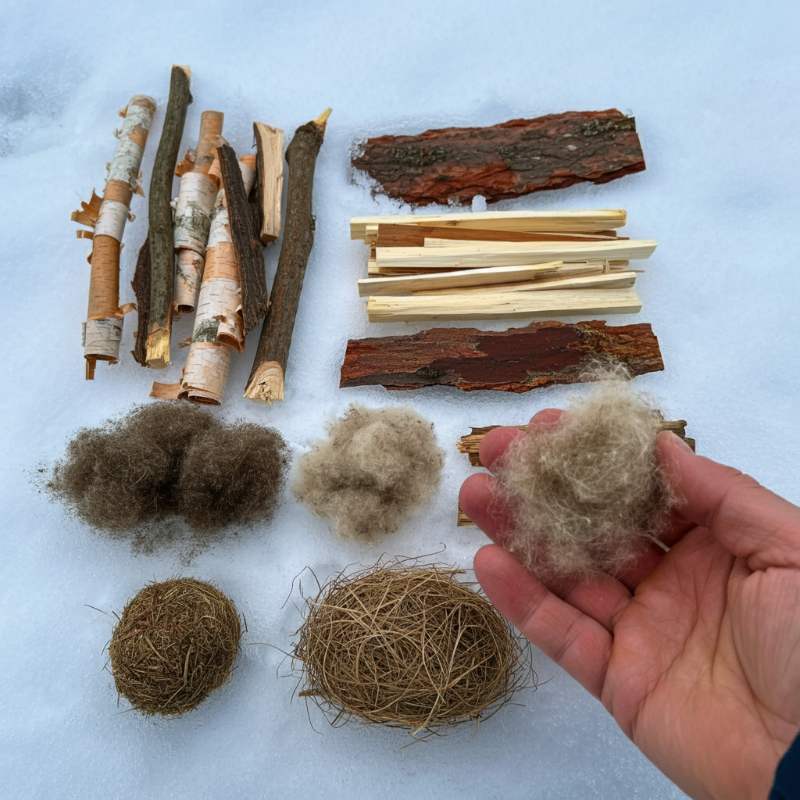 cottonwoods or dead branches of living trees, this bark can be stripped and shredded into a fibrous tinder.
 - Outer Bark of Cedar Trees: Whether the tree is living or dead, the outer bark of cedar is excellent for tinder. Look for the drier side of the tree, and use the back of your knife to scrape off the fibrous material.
- Cattail Fluff: The fluffy seed heads of cattails are highly flammable and can catch even a weak spark.
- Tinder Fungus (e.g., Chaga or Horse Hoof Fungus): Found on birch and other trees, these fungi are excellent for catching sparks and smoldering long enough to start a fire.
- Dry Pine Needles: Found in clusters beneath pine trees, they ignite easily when dry and can help establish a flame.
- Dead Fern Fronds: If dry, fern fronds can provide excellent fluffy, fibrous tinder.
- Milkweed Pods: The silky fibers inside dried milkweed pods are extremely flammable.
- Thistle Down: The fluffy seed heads of thistles ignite easily and burn quickly.
- Juniper Bark: The fibrous bark of juniper trees is great for tinder, especially when shredded into fine threads.
- Dry Leaves: Some dry leaves, particularly those that are thin and papery, can ignite quickly when properly crumbled.
- Dead Grass on South-Facing Slopes: South-facing slopes often have dry, gray-colored grass, which makes excellent tinder. Seek out the gray, brittle grass for the best results.
- Fibrous Bark from Shrubs: Bushes that stick up above the snow, like Potentilla, often have fibrous bark that can be peeled off and shredded into tinder.
What to Look For
Not every plant or tree will have the right materials, but you’re searching for these qualities:
- Hair-like fibers that can be teased apart.
- Materials that are dry and brittle, even in damp conditions.
- Bark or plant matter that can easily be broken down into a fluffy texture.
Pro Tip: Don’t limit yourself to specific plants or trees, look for the properties of the materials you need. Get outside and experiment. Inspect plants, trees, and bushes to see what works. Trial and error will teach you what burns best. Adapt, overcome, and get that fire started!
You gathered your Tinder But It’s Not Ready Yet!
Gathering tinder is just step one. Don’t get too excited and start striking sparks on a handful of bark strips or some clumped-up grass. Tinder needs processing, and this is where most people mess up. Let me repeat: Process, process, process! Raw tinder is almost never ready to use straight from nature. It’s usually too big, too dense, or both, which means it’s not going to catch a spark or flame without some serious attention.
The Art of Processing Tinder
To create a flame, you need tinder that’s pencil lead thin or smaller. I’m not joking when I say thinner is better. Think about it: the thinner the fibers, the easier they are to ignite. Here’s how to get there:
- Break It Down:
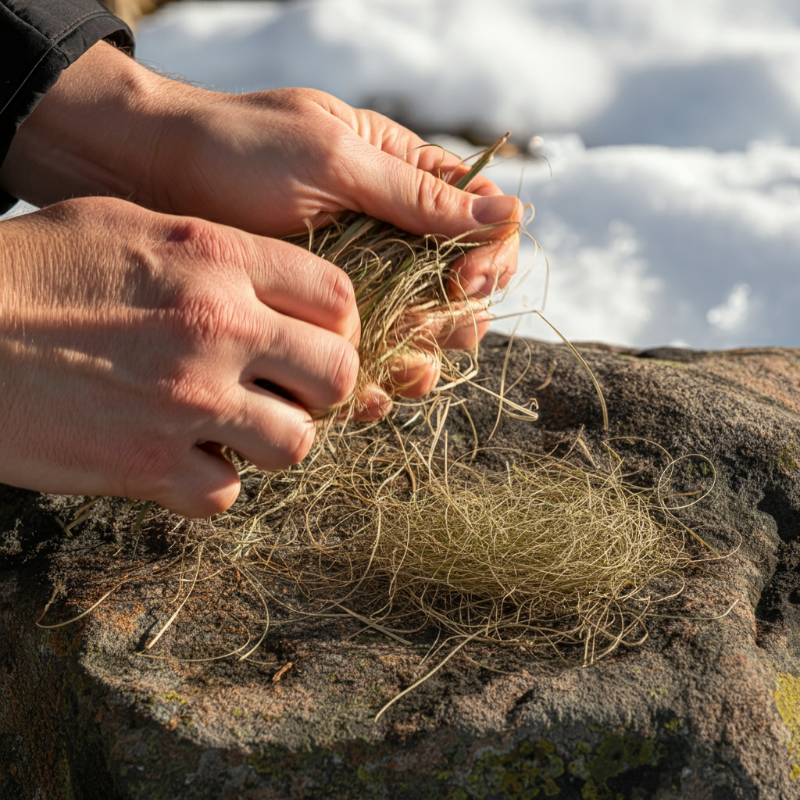
If you’ve gathered bark, dry grass, or plant fibers, start by teasing them apart with your fingers. Rub them between your hands like you’re rolling dough. The goal is to shred the material into long, thin strands. - Go Hair-Thin:
You want fibers that look like strands of hair. Thinner strands expose more surface area to oxygen, which is the secret to catching a spark. If it’s not thin enough, don’t be afraid to spend more time on this step. - Get Aggressive:
- Beat it with a dry rock.
- Scrape it with the back of your knife.
- Pull it apart like you’re teasing out a snarl in a rope.
Whatever it takes to turn your tinder into fluffy, fine, stringy fibers, do it.
- Fluff It Up:
Once your tinder is processed into the right size, fluff it up a little to increase airflow. This means gently pulling it apart so the fibers aren’t compacted, allowing oxygen to flow through. Oxygen is what feeds the spark and turns it into flame.
How Much Tinder Do You Need?
I always tell people to gather a bundle of tinder the size of their head. Why? Because it’s better to have too much than to come up short when your hands are frozen and you’re desperate to get warm.
That said, you won’t need to process all of it. Focus on processing enough tinder to form a ball about the size of two fists. This smaller amount is what you’ll actually ignite, but the extra material in your head-sized bundle will keep feeding the fire once it catches.
Why Processing Matters
Here’s the bottom line: the more time you spend processing your tinder, the more successful you’ll be at starting a fire. Skipping this step is like trying to light a log with a match, it’s just not going to happen. Good tinder preparation makes everything else easier, so take your time, go small, and fluff it up.
Remember, fire loves thin, long fibers and lots of oxygen. If you process your tinder right, you’ll save yourself frustration and precious time when it really counts.
Hunting for Heat: Finding and Preparing Dry Kindling
Now that you’ve got your tinder prepped and ready to go, it’s time to move up the fire-building food chain: kindling. Tinder gets the flame started, but kindling keeps it alive. Think of kindling as your fire’s personal trainer, taking that delicate spark and turning it into a roaring blaze. But here’s the catch, kindling needs to be dry, thin, and ready to burn. If you’re working in snowy conditions, finding and preparing it is an art all its own.
Snap small, dead branches from trees but focus on finding dry ones. There’s usually dry wood somewhere, so don’t waste time on branches that are damp. If a branch bends instead of snapping cleanly, it’s still green and won’t burn well, so move on to something better. Keep looking, and you’ll often find dry material on trees with dense canopies that shield branches from moisture. However, if everything is soaking wet, you can strip away the outer wet layer to expose the drier wood inside. In the worst-case scenario, when even this isn’t enough, we’ll cover techniques like batoning wood and making feather sticks next. These methods can help you create dry kindling from even the wettest conditions. Keep searching and don’t give up!
Let’s Talk About Batoning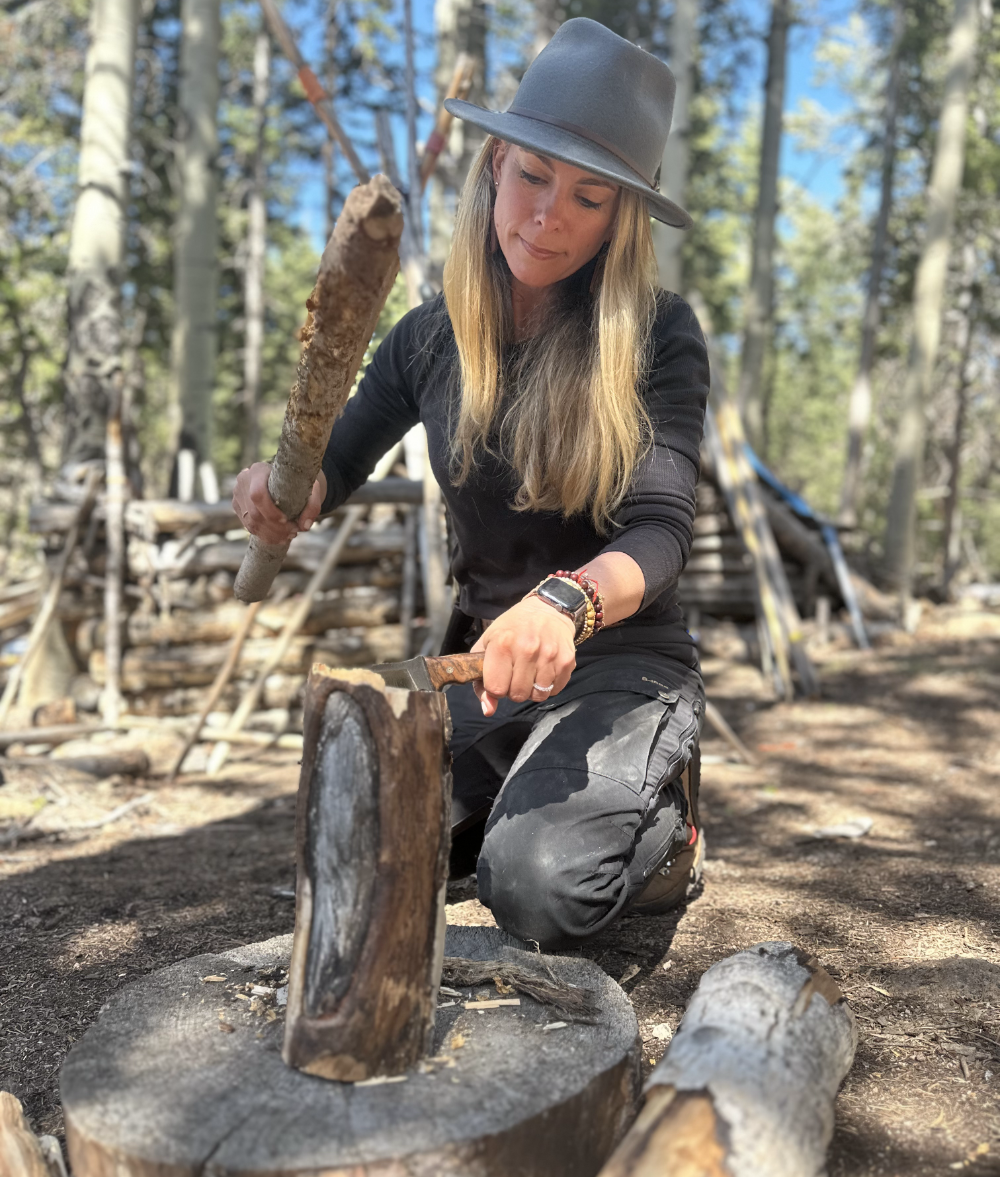
Batoning is a handy technique for splitting wood using a knife instead of an axe. It’s simple, precise, and often safer than swinging a sharp blade around. Here’s how it works: lay your knife across a log or chunk of wood, then use a dense, sturdy stick to drive the knife through the log. Done right, this method can take a log about 4 inches (10 cm) in diameter and split it into 30 or more thin slivers, each about the size of your little finger. These thin pieces make excellent kindling and expose the dry inner core of the wood, which is a game-changer in wet conditions.
For the best results, try cutting your logs into sections about 1 foot (30 cm) long using a saw, though this isn’t strictly necessary. It also helps if your knife blade is longer than the diameter of the log you’re working with. A proper bushcraft knife with at least a 4.5-inch (11 cm) blade is ideal, leave the pocket knives in your pocket and bargain bin blades at home. Invest in a quality knife that won’t let you down when you need it most.
Now, ultralight hikers, I know this might feel like a tough pill to swallow, but when things go wrong, that razorblade that you have tucked away with your pencil sharpener, just won’t cut it (pun intended). Just saying.
Here’s a tip: aim to split sticks the full length of the log, with a thickness similar to your little finger. If the wood starts breaking into shorter, uneven pieces, it might be time to stop or try a different log. You’re aiming for a pile of consistent, pinky-sized sticks. Not slivers of toothpicks and definitely not wrist-sized logs! Trust me, this detail is key for building an effective fire.
Many people find batoning oddly therapeutic, it’s a great way to focus and refine your fire-building prep. But don’t get lazy. The more time and effort you invest in processing your wood, the better your chances of getting that fire roaring when you need it most. So pay attention, take your time, and process, process, process!
Feather Sticks: Your New Best Friend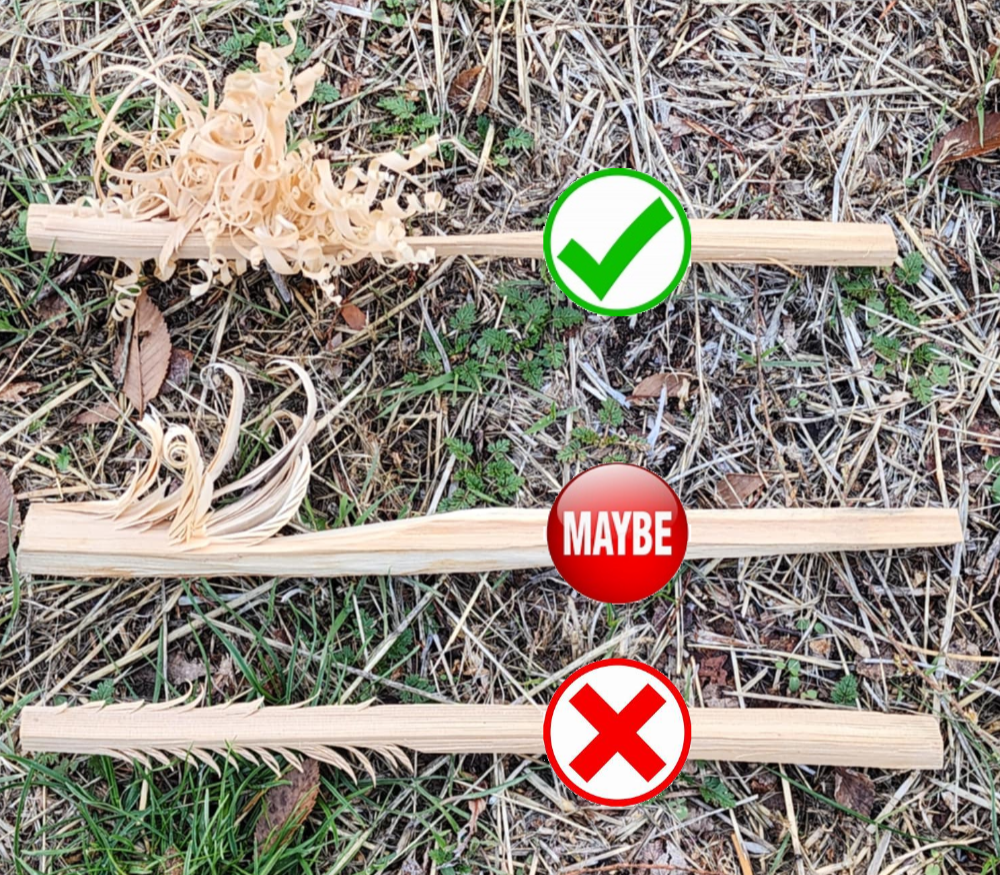
Feather sticks are a fire starter’s secret weapon. The concept is simple: take a dry branch or piece of wood and shave long, thin curls into it. These “feathers” catch fire easily, giving you a reliable way to ignite kindling when conditions are less than ideal. Think of it as whittling with a mission.
While using branches can work, feathering the sticks you’ve created from batoning is often easier and more effective. Focus on the hard edges you’ve exposed during splitting, working them down into curls. Each time you shave a curl, you’ll create new edges to work on, just continue this process until your stick is bristling with fine curls. A sharp knife is key to success here, and don’t be discouraged if it takes practice.
Tips for Effective Feather Sticks:
- Long Curls Are Best: Avoid short, choppy cuts. Instead, aim for long, thin curls that stay attached to the stick. These are easier to ignite and keep the fire going.
- Work All Sides of the Stick: Ideally, you want curls on every side of your stick. The more curls, the better your chances of success.
- Angle Matters: Hold your knife at a low angle as you slide down the stick. Start with the knife perpendicular to the wood, then tilt it to one side or the other as you shave. Tilt your blade one way or the other depending on which way you want the curl to go. This creates those beautiful, flowing curls. Hard to explain without going hands on so if you aren’t grasping the concept, come join us for one of our Beginning Survival Courses.
- Don’t Sweat Detached Curls: If you accidentally cut curls off the stick, don’t worry, they’re still usable. While attached curls are more convenient, loose ones work just fine. It just won’t look as Instagram-worthy.
Let’s clear up a common misunderstanding: the term “feather stick” can be misleading. Some people make short, insignificant curls that barely help with fire-starting. A better name might be “curl stick,” but the original term has stuck. Focus on creating long, delicate curls.
When to Use Feather Sticks
Feather sticks are invaluable when all other kindling is wet. They allow you to expose the dry inner core of the wood and create material fine enough to ignite with sparks or a small flame. However, if you’ve already collected dry kindling from standing deadwood or snapped branches, feather sticking may not be necessary. My preferred method is always to find dry kindling straight from a tree, but in wet conditions, feather sticks can save the day.
Feathering takes practice, so don’t wait for an emergency to try it. Experiment with different angles and techniques until you can produce curls quickly and consistently. With time, this skill will become a valuable part of your fire-starting repertoire.
Building the Foundation: Fire Lays for Snowy Conditions
Once you’ve got your materials, it’s time to structure your fire. Here’s how to make sure it doesn’t fizzle out before it gets going.
Raise It Up
Snow is not your friend when it comes to fire. Always build your fire on a base of dry logs, rocks, or other platform to keep it from melting into the ground.
Building the Right Fire Lay: Setting the Stage for Success
When it comes to starting a fire in snowy or harsh conditions, the fire lay is the foundation of your success. Get this wrong, and your flame could smother, sputter, or fizzle out faster than you can curse the wind. The good news? There are a handful of fire lays you can use to build a dependable flame, but not all of them are created equal. Here’s the lowdown on what works, what doesn’t, and why some fire lays are worth your time while others deserve to be tossed in the metaphorical (and literal) fire.
Log Cabin Fire Lay: A Classic With a Twist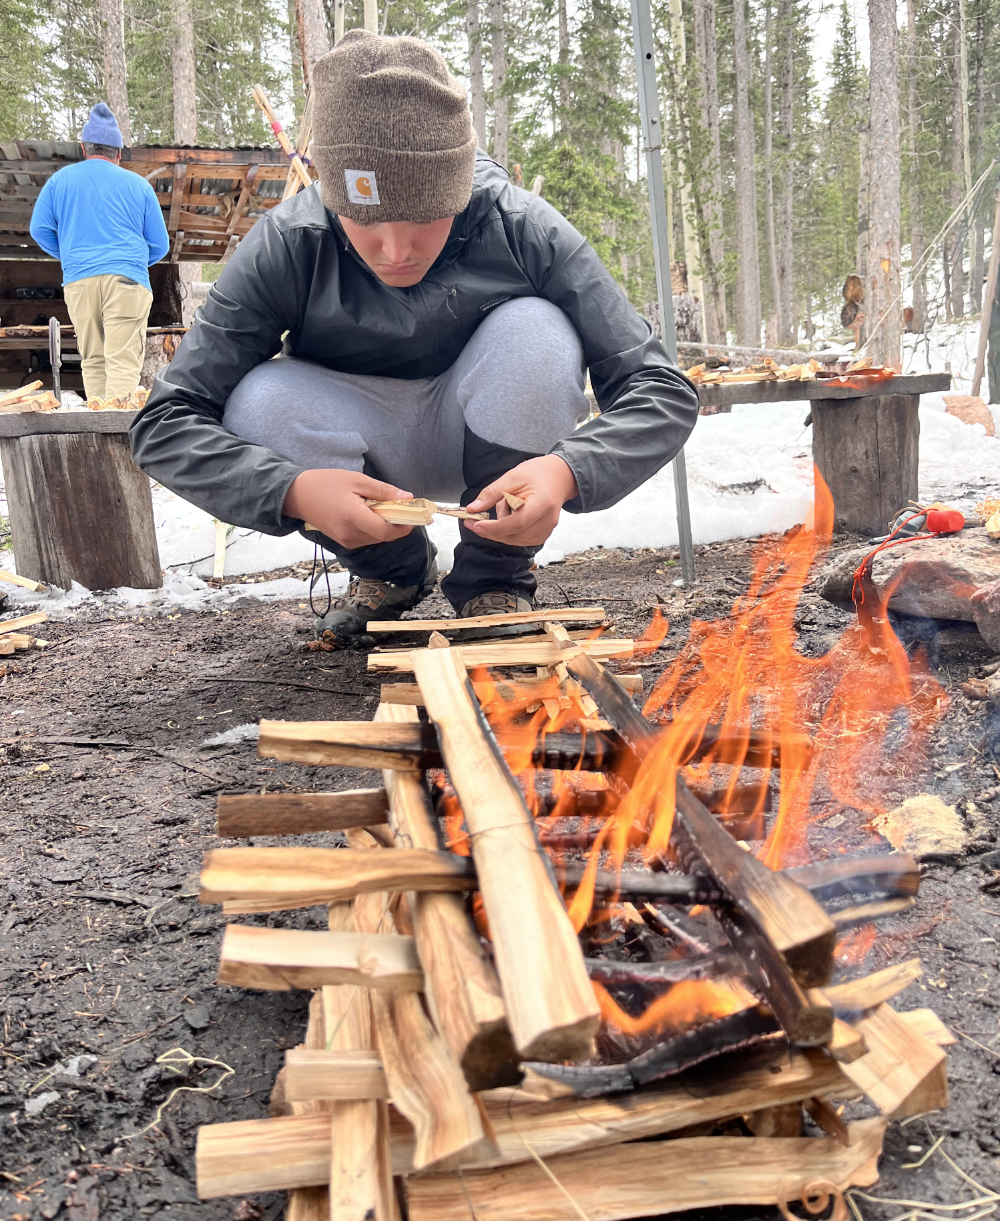
The log cabin fire lay is a sturdy, reliable option—especially if you’ve already followed my advice about batoning wood. Use the irregular sticks from batoning (you know, the ones you’d otherwise toss in frustration) to build the base structure. Here’s how to set it up:
- Start with a Platform: As with any fire, you’re going to want a solid base to keep it elevated off the snow. Use the garbage wood from batoning or larger, dry logs to create a stable platform.
- Stack in a Square: Lay two larger sticks parallel to each other on the platform, then stack two more perpendicularly on top of those. Repeat this pattern to create a square structure with open airflow in the center. Continue stacking until the structure is roughly 8 inches (20cm) high.
- Fill the Center with Tinder: Place your processed tinder and small, in the center of the square. This setup ensures your flame gets plenty of oxygen. Keep the tinder lofty and don’t jam a bunch of other kindling in there. The log cabin IS the kindling.
The beauty of the log cabin lay is its sturdiness. Once lit, the structure holds up well and keeps feeding the fire with excellent airflow.
Pro Tip for the Log Cabin Fire Lay: Place some lofty tinder inside the log cabin structure, but keep your processed tinder bundle outside and off to the side for now. Here’s the magic: light the processed tinder bundle next to the log cabin (especially if you’re using a ferro rod) to avoid accidentally knocking over your carefully stacked creation. Once the tinder bundle is lit, pick it up and give it a roll so the flames are on the side or bottom, remember, fire loves to climb. Gently transfer the burning bundle into the lofty tinder inside the log cabin.
If you’re worried about burning your fingers, grab a couple of sticks and use them like chopsticks or salad tongs to move the burning tinder. This method not only keeps your fire lay intact but also gives your flames the best chance to grow into a roaring blaze.
Teepee Fire Lay: The Overrated Poster Child
The teepee fire lay is a darling of survival manuals, but let me be honest: I hate it. Yes, it’s simple in theory, stack sticks in a cone shape, light it, and let the flames climb upward. But in practice? This thing topples over at the slightest touch, takes forever to set up properly, and doesn’t deliver the results you want when time and resources are limited.
Let’s break it down:
- Setup Time: You’re painstakingly balancing sticks into a cone. Sounds easy? It’s not, especially when your fingers are frozen and you’re racing against time.
- Stability Issues: One wrong move, and your entire structure collapses into a heap of frustration.
Look, if you love the teepee fire lay and it works for you, keep at it. But for me, it’s a waste of time and energy. Save your creativity for snow sculptures and pick a fire lay that doesn’t make you want to throw your gloves in the fire out of frustration.
Lean-To Fire Lay: The Real MVP
If there’s one fire lay you need in your arsenal, it’s the lean-to. This fire lay is simple, fast, and effective, everything you want when the conditions are less than ideal.
How to Build a Lean-To Fire Lay
- Start with a Sturdy Base: Lay a thick log or rock on the ground. This will act as the “backbone” of your fire lay and shield your tinder from the wind.
- Prop Smaller Sticks Against the Backbone: Angle smaller pieces of kindling against the main log to form your lean-to structure. Fire loves chaos! Don’t stack your sticks in a neat formation. The lean-to fire lay thrives on being a big jumbled mess, with plenty of random air gaps to feed oxygen to the flames. Fire needs air to burn well, so resist the urge to make it look tidy. A perfectly flat, neat stack will only smother your fire and leave you frustrated. The lean-to fire lay is about function, not beauty, so embrace the mess and let the flames do their thing.
- Place Tinder Underneath: Put your processed tinder directly beneath the lean-to structure, right where the flame will catch and spread upward.
Boom! Done! Winning!
The beauty of the lean-to fire lay is in its simplicity. There’s no need for delicate balancing acts or intricate stacking. Once lit, the flame climbs up the angled kindling, feeding on the oxygen and growing steadily.
If your kindling is being stubborn and the fire’s acting more like a moody teenager than a roaring inferno, don’t panic. Remember that head-sized bundle of tinder I told you to gather? Grab some tiny bits from it and start tucking them strategically under or inside your lean-to. Think of it like giving your fire some extra baby food—it just needs a little more nourishment to grow up big and strong.
Fire Dog Fire Lay: The Lean-To’s Overachieving Cousin
The fire dog fire lay is a slight modification of the lean-to that takes airflow to the next level. It’s essentially a lean-to fire lay with elevated support, which improves airflow and helps the fire burn hotter and longer.
How to Build a Fire Dog Fire Lay
- Set Two Logs Parallel to Each Other: Start by placing two sturdy logs parallel to one another on the ground, about 2 feet (60cm) apart. These will act as “rails” for your structure.
- Elevate the Backbone: Rest the backbone log of your lean-to on top of the parallel logs. This lifts the structure off the ground and creates a gap for airflow beneath the fire.
- Build a Lean-To Structure: Prop smaller sticks of kindling against the elevated backbone, just like in a regular lean-to fire lay. Remember, FIRE LOVES CHAOS!
- Add Tinder Below: Place your tinder below the center of the structure, ensuring it’s directly in the path of the airflow.
Why is this better? The elevated design ensures the fire gets plenty of oxygen from below, which keeps it burning hotter and more efficiently. Plus, the extra height makes it easier to add more tinder if the flames don’t take off right away. It’s an all-around win.
Pro Tip for Lean-To and Fire Dog Fire Lays: Set up your support structure and place your tinder in position, but hold off on adding the kindling right away. Instead, keep your kindling bundled and ready nearby. Light your tinder first, letting it catch and burn strong, then gently lay your kindling over the fire. This method works just as well but gives your processed tinder the best chance to ignite without being smothered by the kindling too soon.
Platform Fires: A Foundation, Not a Fire Lay
Let’s be clear: every fire you build in snowy conditions should start on a platform. Whether it’s a log cabin, lean-to, or fire dog, having a stable, dry base keeps your fire elevated and protects it from melting into the snow. So while the “platform fire” is often listed as a fire lay, I consider it more of a foundation. You’re always going to need a base of dry logs or rocks to give your fire a fighting chance.
Mastering Fire Lays: Practice Makes the Flame Perfect
At the end of the day, fire lays aren’t about impressing anyone with your wilderness craftsmanship. They’re about getting a fire started as quickly and efficiently as possible so you can stay warm, cook food, and survive. The lean-to and fire dog fire lays are your go-to choices for simplicity and effectiveness. The log cabin is a solid option if you’ve got the time and materials. And the teepee? Well, I think we’ve said enough about that.
The key to success is not just knowing how to build these structures but practicing them before you need them. Spend some time in your backyard or on a weekend trip experimenting with different fire lays. That way, when it really counts, you’ll be ready to get that fire roaring in no time.
Fire Starting Pro Tips
- Practice Makes Perfect: If you’ve never used a ferro rod before, don’t wait until you’re freezing to figure it out. Spend a weekend practicing in your backyard or on a casual hike. Muscle memory and confidence go a long way when the stakes are high.
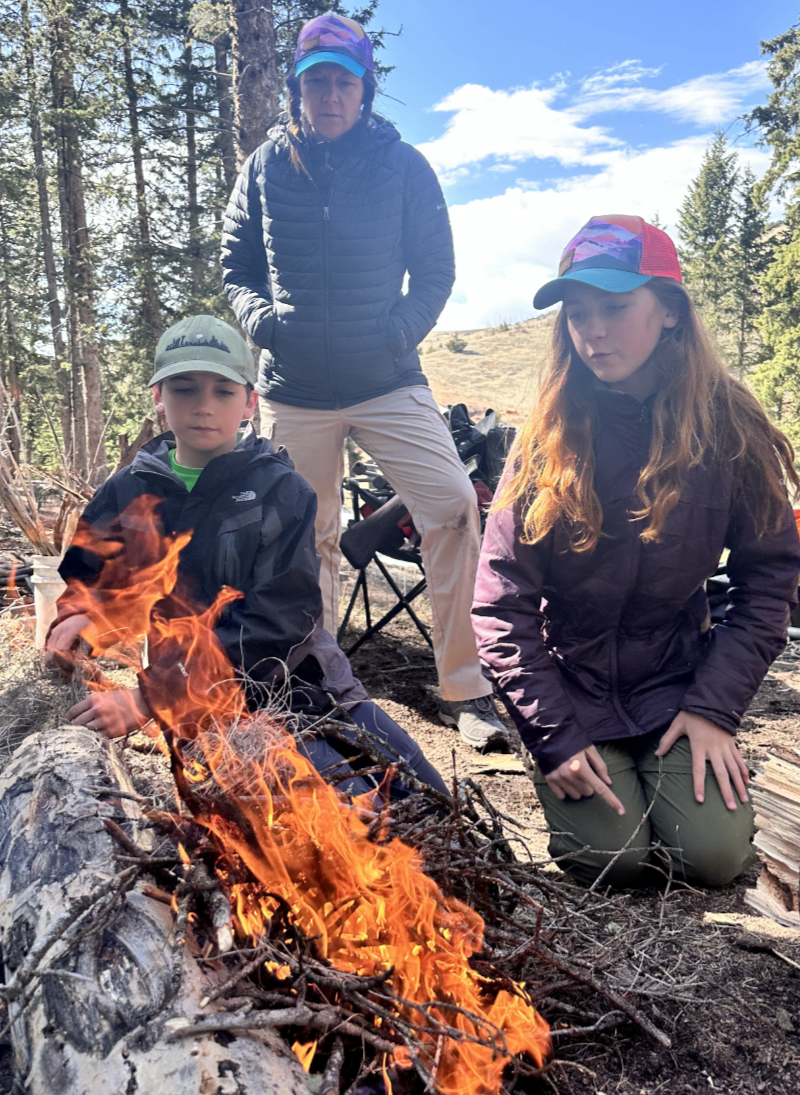
- Protect Your Fire: Wind and snowfall are your fire’s mortal enemies. Build a windbreak using rocks, logs, or even a snowbank. If you have time, set up a reflective wall to bounce heat back toward you and amplify warmth.
- Stay Calm: Fire building takes patience. Frustration and frantic movements will only make things harder. Take a deep breath, focus on the process, and channel your inner pyromaniac (responsibly).
- Dry Your Materials: If you’re working with damp wood, stack pieces around the edge of your fire as it starts to burn. The heat will help dry out the wood, making it easier to feed your flame.
- Carry Fire Starters in Multiple Places: Keep tinder and fire-starting tools in multiple pockets or pouches in case one set gets wet or lost. Redundancy is your best friend in survival situations.
- Don’t Blow It Out: When coaxing embers into flames, don’t blow on small flames. What do we do with a birthday candle? You blow on coals, not flames! A steady, soft exhale at first is enough to provide oxygen without extinguishing your spark.
- Use What Nature Provides: Look for natural fire-starting materials like birch bark, fatwood, or dry grass. These can give you a head start when your prepared tinder isn’t enough.
- Don’t Rush the Tinder Bundle: Spend extra time processing your tinder into fine, fluffy fibers. A well-prepared tinder bundle will save you a ton of frustration when it comes time to light it.
- Keep Lighters Warm: If you’re using your BIC, keep it close to your body to keep the fuel above freezing in extreme cold. Cold fuel doesn’t combust as well.
- Save the Biggest Logs for Last: Start small and build up gradually. A common mistake is throwing a massive log onto a delicate flame too early, smothering it before it has a chance to grow.
- Pack a Candle: A small candle can act as a backup ignition source or even serve as a low-maintenance heat source inside your shelter.
Final Thoughts: Mastering the Art of Fire Starting in the Snow
There’s something deeply empowering about taming the elements and coaxing life from a spark in the dead of winter. Fire starting in snowy conditions isn’t just a survival skill; it’s a test of patience, preparation, and resourcefulness. It challenges you to think critically, work with what you’ve got, and adapt to an environment that isn’t exactly rooting for your success.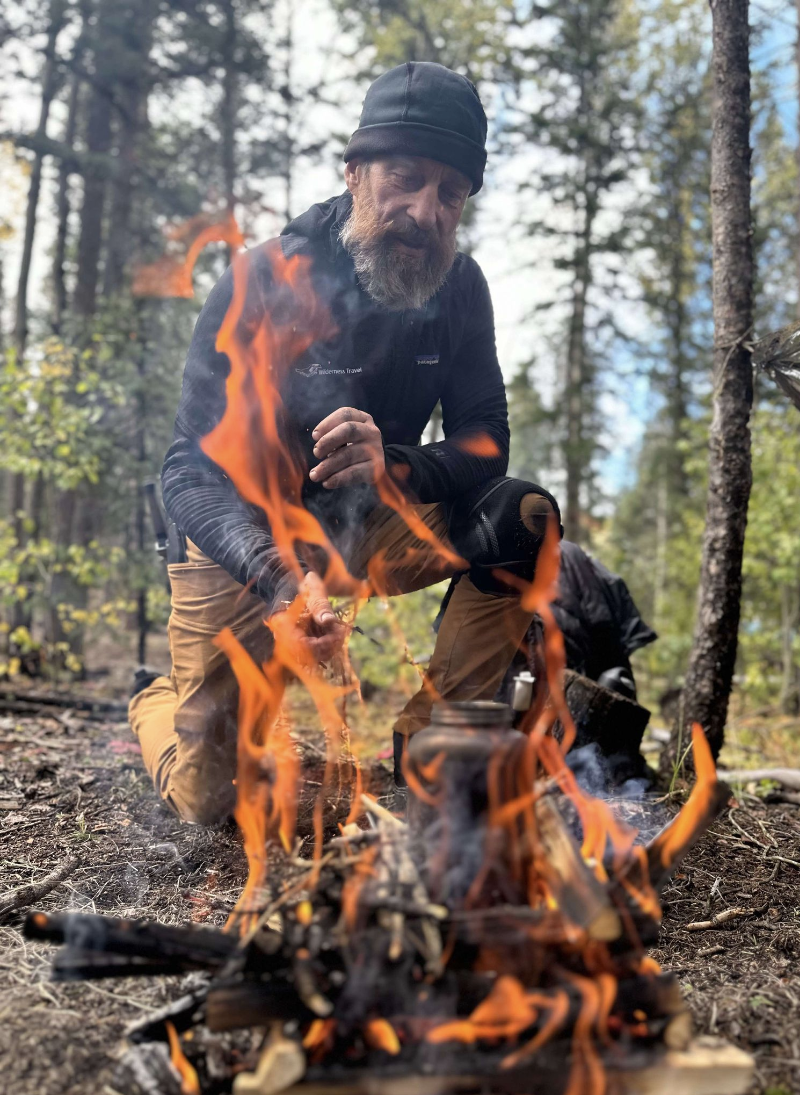
The key takeaway? Preparation is everything. Practice these techniques before you’re caught in the cold, experiment with different fire lays, and get comfortable processing tinder and kindling. The time you spend mastering these skills now could save you hours of frustration and potentially your life, when you really need them.
Above all, remember that starting a fire is as much about mindset as it is about technique. Stay patient, stay determined, and stay adaptable. Whether you’re coaxing sparks from a ferro rod or carefully building a lean-to fire lay, every successful fire starts with the decision not to give up.
So, what’s your fire-starting story? Have you ever battled wet wood, snowy conditions, or stubborn tinder? What tricks or techniques saved the day, or didn’t? Share your experiences in the comments below. You never know, your hard-earned wisdom might just help someone else ignite their own flames of survival!
- Part 1: Winter Survival in the Colorado Rockies — Introduction and Pre-Trip Planning
- Part 2: Winter Survival in the Colorado Rockies — Must-Have Gear and Clothing
- Part 3: Winter Survival in the Colorado Rockies — Building and Maintaining a Shelter
- Part 4: Winter Survival in the Colorado Rockies — Starting Fires in Snowy Conditions
- Part 5: Winter Survival in the Colorado Rockies — Staying Hydrated in the Winter Wilderness
-
Part 6: Winter Survival in the Colorado Rockies — Navigating and Avoiding Avalanche Danger
Leave a Comment
Winter Survival in the Colorado Rockies — Part 4: Starting Fires in Snowy Conditions
Why Fire Matters in Winter Survival. Fire is more than just warmth; it’s survival itself. Let’s break it down. First, there’s the obvious: fire keeps...
Survival Challenge – One Match Fire
Do you ever test your survival skills? Looking for a way to challenge yourself in a practical way that may be useful in a survival...

