Cart
16 min read
Winter Survival in the Colorado Rockies — Part 3: Building a Winter Shelter
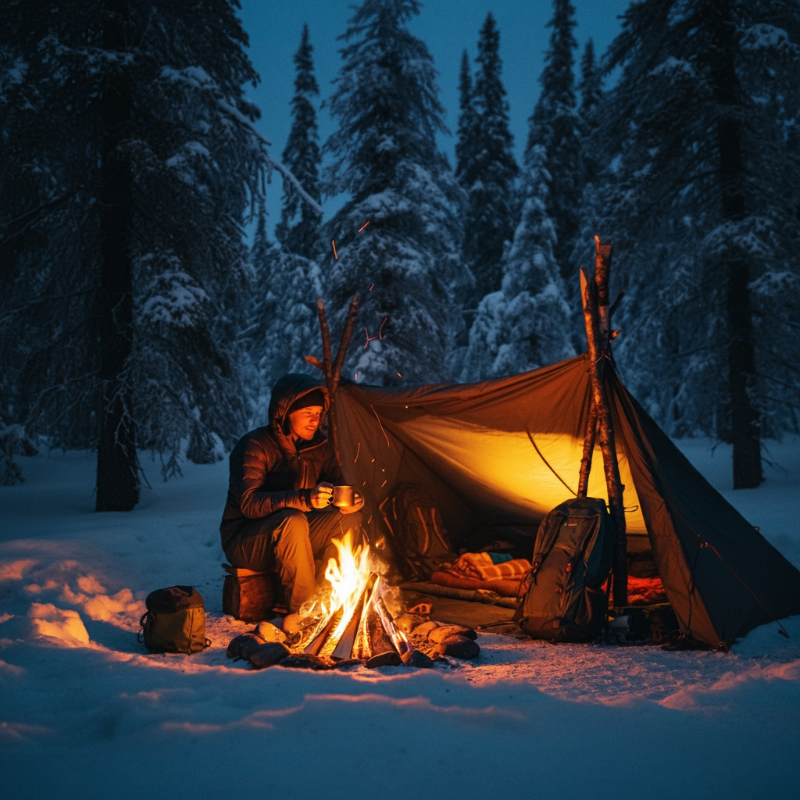
Part 3: Winter Survival in the Colorado Rockies — Building a Winter Shelter
“Finding Warmth in the Snow: Building a Shelter to Weather the Storm”
Winter adventures in the Colorado Rockies are exhilarating—a mix of sparkling snow, crisp air, and the thrill of exploring some of the most breathtaking landscapes on Earth. Maybe you’re snowshoeing through a quiet forest, hiking to a frozen lake, or just going out for a short day hike. It’s all going perfectly, and you’re feeling invincible—until it isn’t.
Picture this: You’ve ventured farther than planned, and the daylight is fading. 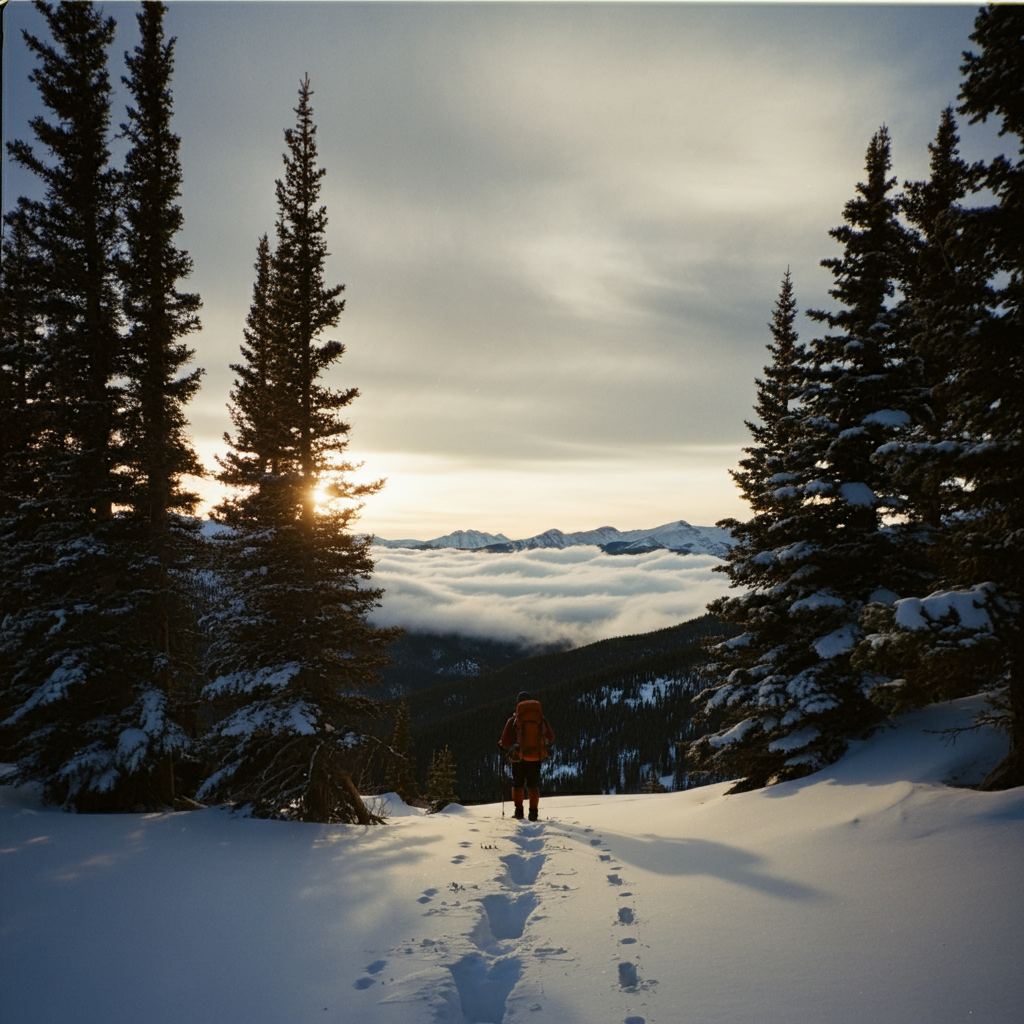 The clouds thicken, the wind picks up, and snow begins to fall faster than expected. Suddenly, that postcard-worthy landscape turns into a race against the elements. You realize you’re not making it back to the trailhead before nightfall, and the cozy fire at home is a distant dream. It’s time to shift gears, think on your feet, and build a shelter to hunker down for the night.
The reality is that every time you head into the mountains, you should go with the mindset that something could go wrong. It’s not about fear; it’s about preparation. Having the right gear to spend an unexpected night outdoors isn’t just smart—it could save your life. A tarp, some paracord, a snow shovel, and the proper clothing can make all the difference between a cold, uncomfortable night and a serious emergency.
We’ve already talked about layering and clothing in a previous section, so you know the drill: no cotton, wear layers, stay warm, stay dry. Here, we’ll focus on the tools and techniques you need to create a winter shelter that’s simple, effective, and designed to keep you safe. Whether it’s a sudden storm, a wrong turn, or just getting caught up in the joy of the adventure, knowing how to build a shelter could turn a potential disaster into just another great story for the campfire later.
Now, let’s dive into the how-to so you’re ready to handle whatever the Rockies throw at you.
What to Pack for Shelter Building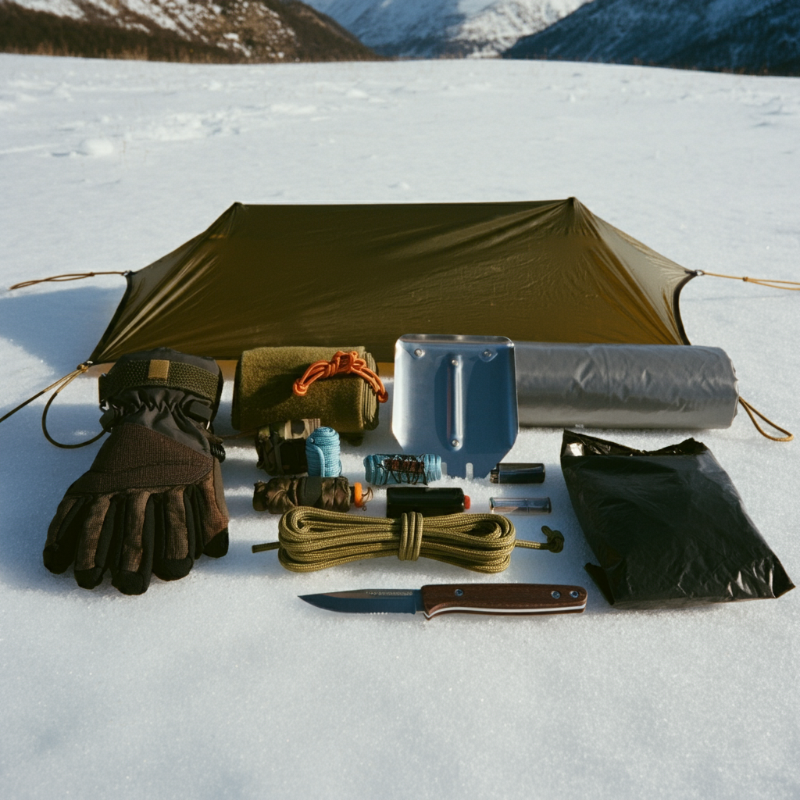
Keep your pack light but practical with these basics:
- A lightweight tarp (for quick shelters).
- Paracord (minimum 25 feet).
- A collapsible metal snow shovel.
- Waterproof matches or a reliable lighter and ferro rod.
- Gloves for digging and insulating.
- A multi-tool or knife for cutting branches or other materials.
- A heavy-duty black trash bag.
- Mylar blanket.
Step 1: Picking the Right Spot
Before you start digging or setting up, scout for the right location. A poorly 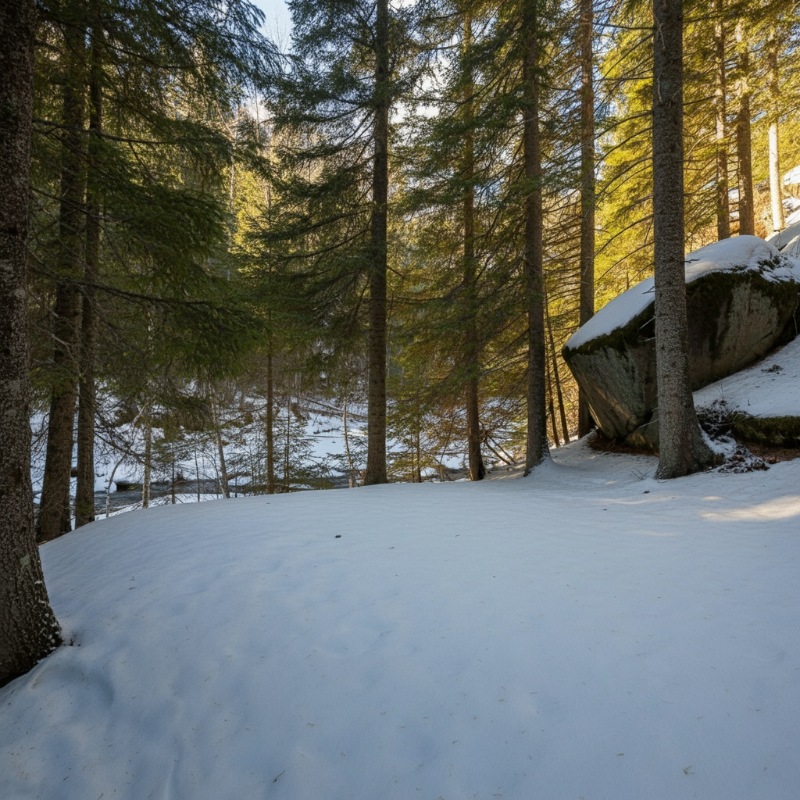 chosen spot can undo even the most beautifully crafted shelter. That said, don’t spend hours hunting for perfection—decide quickly and use your best judgment. The storm won’t wait, and neither will the setting sun. Prioritize safety and practicality, then get to work. A decent shelter in a good-enough spot beats a flawless location with a half-finished shelter.
What to Look For:
- Flat Ground: Avoid steep slopes where snow could slide. Uneven ground can make sleeping uncomfortable and shelter building trickier. A slight slope can be manageable.
- Natural Windbreaks: Clusters of trees, large boulders, or terrain features like ridges can shield your shelter from biting winds.
- Snow Depth: For snow caves or quinzhees, aim for areas with at least 3 feet of packed snow. No snow? Opt for a tarp shelter instead.
- Sunlight Exposure (if possible): A spot that gets sunlight can help warm your shelter during the day, making it more comfortable. This can be particularly helpful if you’re stuck for more than one night.
- Near a Water Source, but Not Too Close: Build near a stream or water source for convenience, but stay on higher ground at least 100 feet away. The temperature is often colder near water, and flash floods are a real danger, even in winter.
- Proximity to Resources: Choose a location with easy access to firewood, insulating materials (like pine boughs and leaves), and snow or water for melting.
What to Avoid: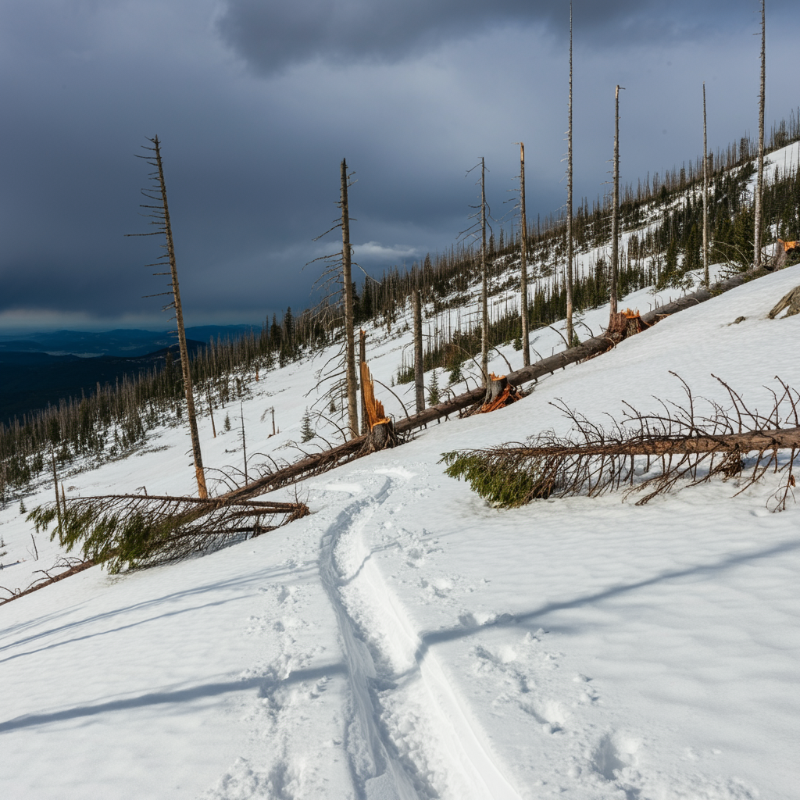
- Hilltops: While being elevated above a water source is good, don’t camp on the very top of a hill. It’s exposed to high winds and a prime target for lightning.
- Widow Makers: Never build a shelter near dead trees or under dead branches. These are called “widow makers” for a reason—they can fall without warning, especially in strong winds or heavy snow. If you have the tools and time, safely remove them before building nearby.
- Avalanche Terrain: Steep snow-covered slopes or areas with signs of recent slides are no-go zones.
- Low-Lying Areas: Avoid valleys or depressions where cold air can settle, or water might collect if snow melts.
Step 2: Shelter Options and How to Build Them
Let’s cover some of the best shelter options for the everyday adventurer, focusing on practical designs you can create without hauling a ton of gear. Knowing how to build a winter shelter is a skill that can turn a potentially dangerous situation into a manageable one.
If you’re new to this or want hands-on experience, consider joining one of our survival classes. Our Winter Survival Course is obviously the best option for winter adventurers. The 5-Day Outdoor Survival Basics Course is a great way to learn comprehensive skills, including shelter building. If five days feels like too much, we also offer a 3-Day option that’s packed with practical techniques to get you started. All of our courses provide expert instruction and the opportunity to practice these critical skills in real-world scenarios.
Learning to build shelters isn’t just about survival; it’s about gaining confidence in the outdoors and being prepared for whatever your adventure throws at you. Now, let’s break down the shelter options so you can stay safe and warm in any situation.
1. Expedient Lean-To Tarp Shelter
When you’re short on time and materials, a simple lean-to tarp shelter is a lifesaver. It’s quick, effective, and perfect for keeping you out of the wind.
What You Need: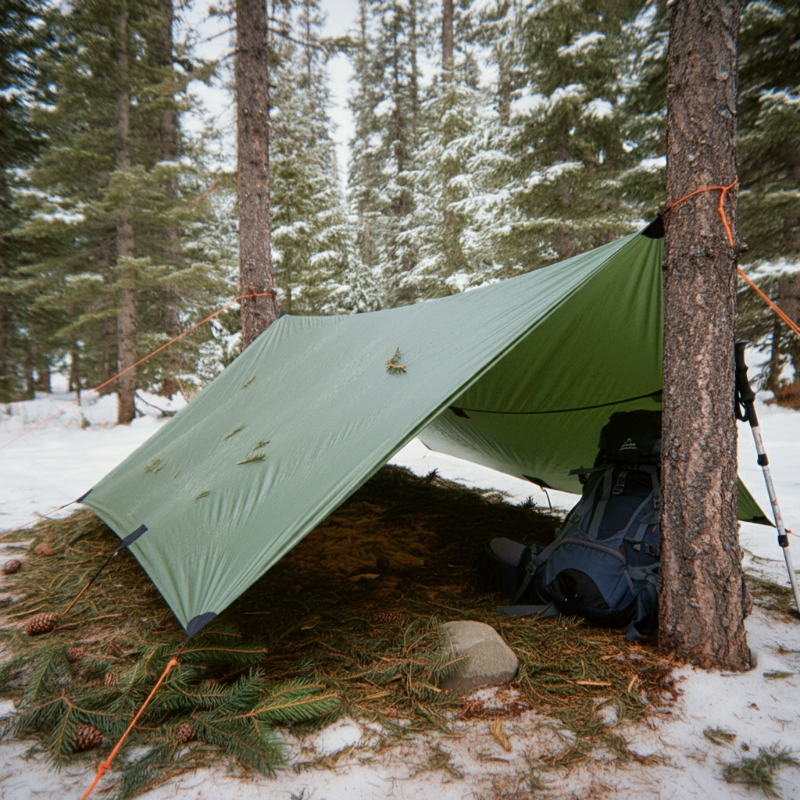
- A tarp.
- Paracord.
- Basic knot-tying skills.
How to Set It Up:
- Secure one side of the tarp to sturdy branches or between two trees using paracord and knots.
- Angle the tarp so it deflects wind and snow or rain.
- Use stakes, rocks, or more paracord to secure the edges.
- Lay down as much leaf debris or pine boughs underneath the tarp as you can to create a barrier between you and the ground. The ground will pull heat from your body through conduction, which can be dangerous in cold conditions. Aim for at least 4 inches of insulating material to keep the cold at bay and retain your body heat.
Pro Tip:
For a step-by-step guide on the knots and setup I use, check out my YouTube video here. Keep in mind, these knots take practice, so if you’re not planning to master them beforehand, just do your best with what you know in the moment.
2. Snow Caves
A snow cave is an excellent option when snow depth and time are 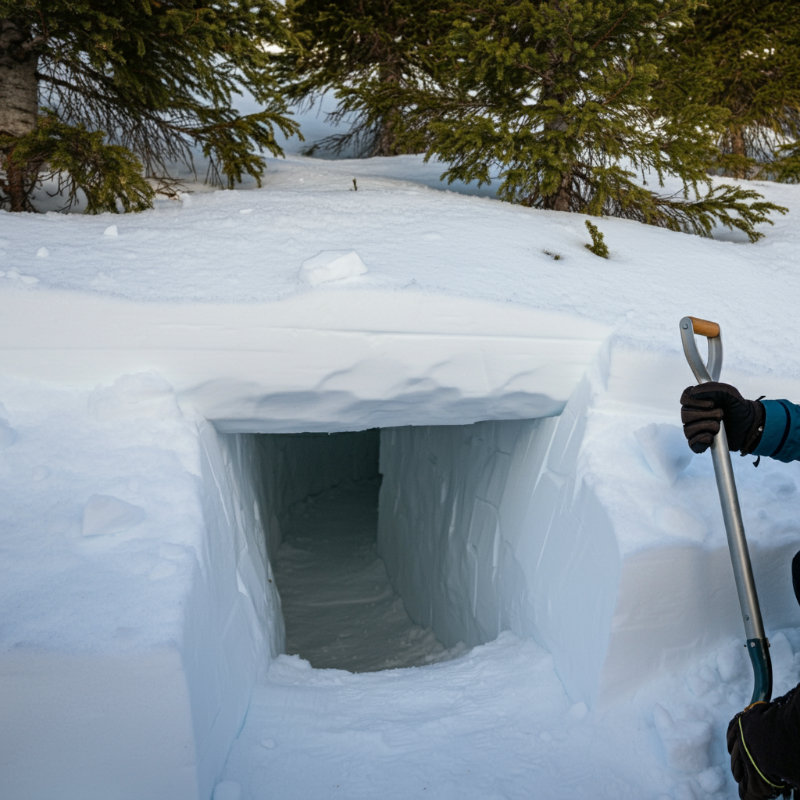 on your side. Snow is a surprisingly good insulator, and a well-built cave can trap your body heat, keeping you significantly warmer than being exposed.
What You Need:
- A shovel (collapsible works fine).
- Gloves.
- Patience.
Step-by-Step Guide to Building a Snow Cave:
- Find the Right Spot: Look for a deep drift or snowbank at least 3 feet thick to provide adequate insulation and structural stability.
- Dig a Small Entrance Tunnel: Create a tunnel that angles slightly upward into the main sleeping area. This traps warm air inside the shelter and prevents it from escaping through the entrance.
- Hollow Out the Sleeping Area: Inside the snowbank, carve out a sleeping area with an arched roof to improve structural integrity and prevent collapse. Ensure the walls and ceiling are thick enough (about 12 inches) to maintain strength.
- Add Ventilation Holes: Poke a few small ventilation holes through the roof, about the size of a ski pole. These holes allow for airflow and prevent carbon dioxide buildup if you plan to use a heat source or breathe heavily inside the shelter.
- Lay Down Insulation: Place a barrier on the floor of the shelter to insulate you from the cold ground. Pine boughs, branches, a tarp, or spare clothing work well. Aim for at least 4 inches of insulation to reduce heat loss through conduction.
- Mark the Snow Cave: Once the shelter is complete, mark its location clearly in case you wander away and need to find it again. Use a long stick or pole planted in the ground next to the cave, and if possible, tie a scarf, bandana, or any brightly colored material to it to act as a flag. This is especially important in low visibility conditions or if others are searching for you.
- Create a Roof Barrier: If appropriate, build a small barrier or marker around the top of the roof to remind yourself (or anyone else) not to walk on it and risk collapsing the shelter.
- Design for Warmth:
- Sleep in the Highest Area: Warm air rises, so position your sleeping area in the highest part of the shelter to take advantage of this natural effect.
- Cold Air Sump: If you can, dig a small, lower area in the shelter called a cold air sump. This allows the coldest air to collect below your sleeping area, keeping your space warmer. Just make sure you’re not sleeping in the sump itself—stay above the cold air!
By following these steps, you’ll not only create a secure and warm snow cave but also ensure it’s visible, safe, and optimized for a more comfortable night in the wild.
3. Step-by-Step Guide to Building a Quinzhee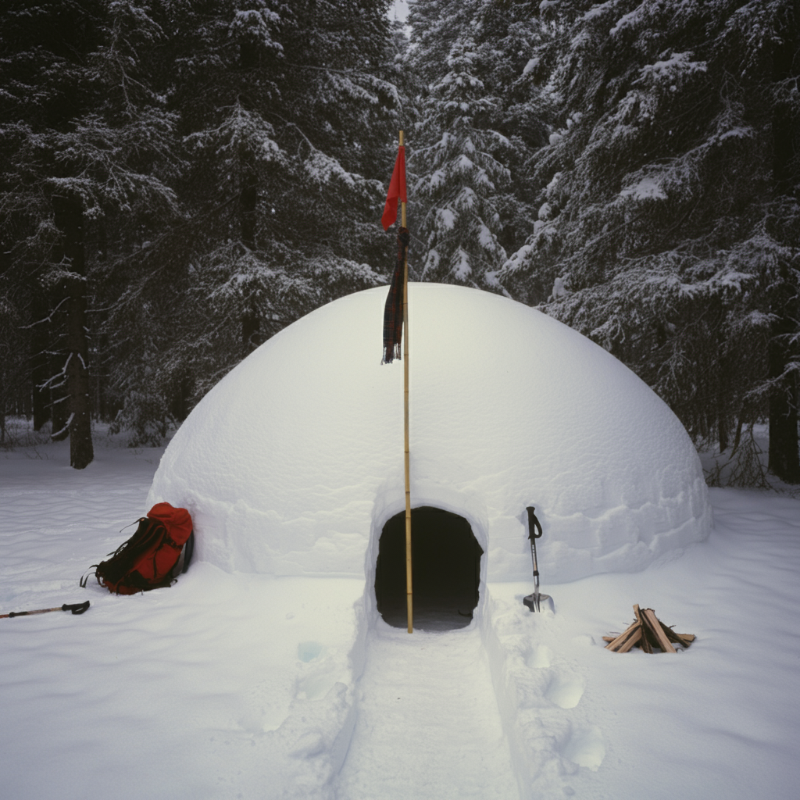
A quinzhee (or quinzee) is a sturdy and effective winter shelter, but let’s not sugarcoat it: building one is not quick or easy. It’s a process that demands time, effort, and patience, especially if you want it to hold up safely. Skipping steps—especially the sintering process—can lead to a collapse, and being buried under several feet of snow is the kind of survival challenge you don’t want to face. Done properly, however, a quinzhee can provide warmth, protection, and even a sense of accomplishment.
What You Need:
- A shovel.
- Gloves.
- Elbow grease and patience.
Step-by-Step Process:
- Select the Right Spot: Choose a flat spot with ample snow. Being near resources like firewood and water is a plus, but avoid avalanche terrain and areas with potential falling hazards.
- Form the Mound:
- Shovel snow into a mound at least 6-8 feet high and 8-10 feet in diameter, depending on the number of people needing shelter.
- Compact the snow as you pile it to create a solid base.
- Sinter the Snow:
- Let the mound sit undisturbed for 1-2 hours. This allows the snow to bond together, making the structure stronger and less prone to collapse.
- Carve and Hollow It Out:
- Start digging from the base of the mound, creating a tunnel that angles upward.
- Hollow out the inside, keeping the walls and ceiling at least 12 inches thick.
- Add Ventilation Holes: Poke holes through the roof for airflow and safety.
- Insulate the Floor: Lay down pine boughs, branches, or spare gear to insulate from the snow.
- Mark and Reinforce the Shelter:
- Use a stick or flag to mark the shelter for visibility.
- Create a barrier around the top to prevent accidental walking on the roof.
4. Step-by-Step Guide to Building a Snow Trench Shelter
A snow trench shelter is a simple yet effective option when time is short, resources are limited, or the terrain isn’t suitable for a tarp lean-to or a quinzhee. It’s not the coziest or fanciest of shelters, but it provides protection from wind and cold, traps your body heat, and can be built quickly with minimal effort.
Step-by-Step Instructions: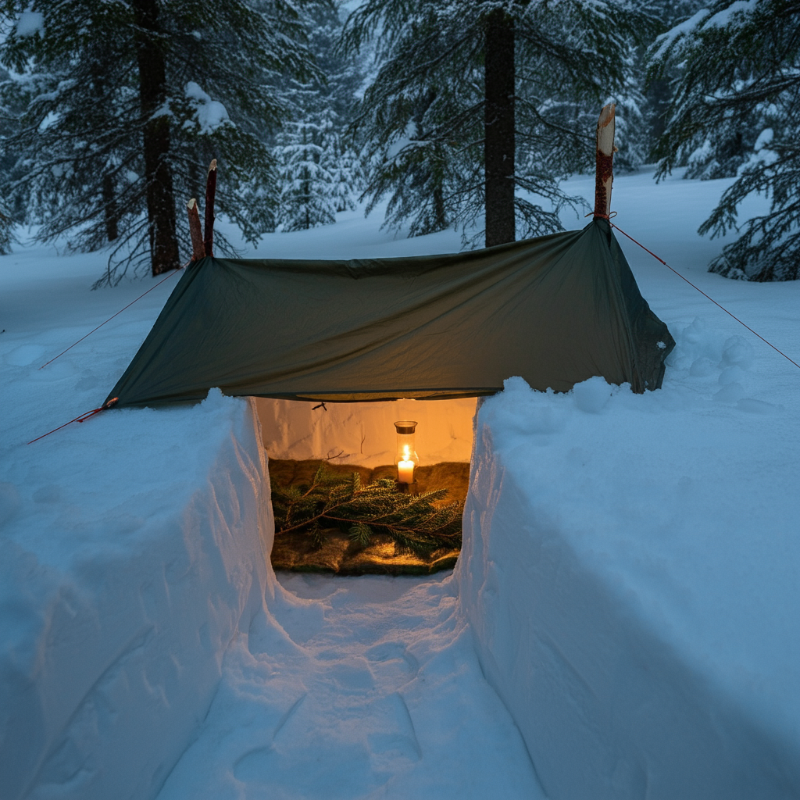
- Find a Suitable Spot:
- Look for an area with a significant amount of snow, ideally on relatively flat ground away from high winds.
- Avoid spots near avalanche-prone slopes or under trees with heavy, snow-laden branches that could fall.
- Dig or Pack the Trench:
- Using a shovel or even just laying down in the snow, dig or compress a trench that’s at least as long as your body and about a foot wider on either side.
- The depth should be enough to keep you out of the wind, typically around 2-3 feet deep.
- Use your feet, body, or the flat side of your shovel to pack down the snow at the bottom of the trench.
- Add Insulation:
- Lay down a layer of insulating material, such as pine boughs, branches, or, if you have it, a sleeping pad or extra clothing.
- This barrier reduces heat loss through conduction and keeps you more comfortable.
- Create the Roof:
- Take a tarp and stretch it over the top of the trench to act as the roof.
- Secure the tarp edges by piling snow on top of them. Be generous with the snow to ensure the tarp stays in place and can withstand wind.
- Optional: Double-Layer the Roof:
- If you have a second tarp or similar material, add a second layer over the first tarp with a small gap in between.
- A space blanket works well for this, placed on the inner layer to reflect heat back at you.
- Leave an Opening:
- Keep one end of the tarp open so you can crawl in and out of the trench.
- Position the opening on the downwind side to minimize exposure to wind and blowing snow. Use your backpack to partially block the opening after crawling inside.
- Use a Candle for Warmth:
- If you have a candle, place it inside the shelter. Even a small candle can help raise the temperature slightly, making the trench feel more bearable. Be cautious with fire safety and ensure ventilation is maintained.
Key Points to Remember:
- It’s Not Perfect: This is a no-frills shelter meant to provide basic protection. It’s not the most comfortable, but it works when options are limited.
- Time Saver: This shelter can be built quickly, making it ideal when time or energy is running out.
- Stay Dry: Ensure your tarp or roof material is waterproof, as staying dry is critical for maintaining warmth in a winter environment.
By following these steps, you’ll have a functional snow trench shelter that can help you weather the elements and improve your chances of staying warm and safe until conditions improve.
Insulating and Maintaining Your Shelter
Once your shelter is built, the work isn’t over. Insulation and upkeep are key to staying warm and safe.
Insulation Tips:
- Use branches, pine boughs, or a tarp to create a barrier between you and the snow.
- If possible, stuff extra clothing or gear into gaps to block wind.
Maintenance Tips:
- Keep your ventilation holes open and free of snow.
- Regularly check the roof of your snow cave or quinzhee for sagging or weak spots.
- Try to limit the amount of snow brought inside on clothing or gear, and clear out wet areas as needed to maintain a dry environment.
- Snow can shift or settle over time, which may create sagging or weak spots in your tarp shelter. Regularly check the roof, especially after using heat or during heavy snowfall.
Bonus: Signal Fires and Smoke Signals
If you’re in a survival situation, a well-built shelter is great—but letting people know where you are is even better.
How to Build a Proper Smoke Signal Machine: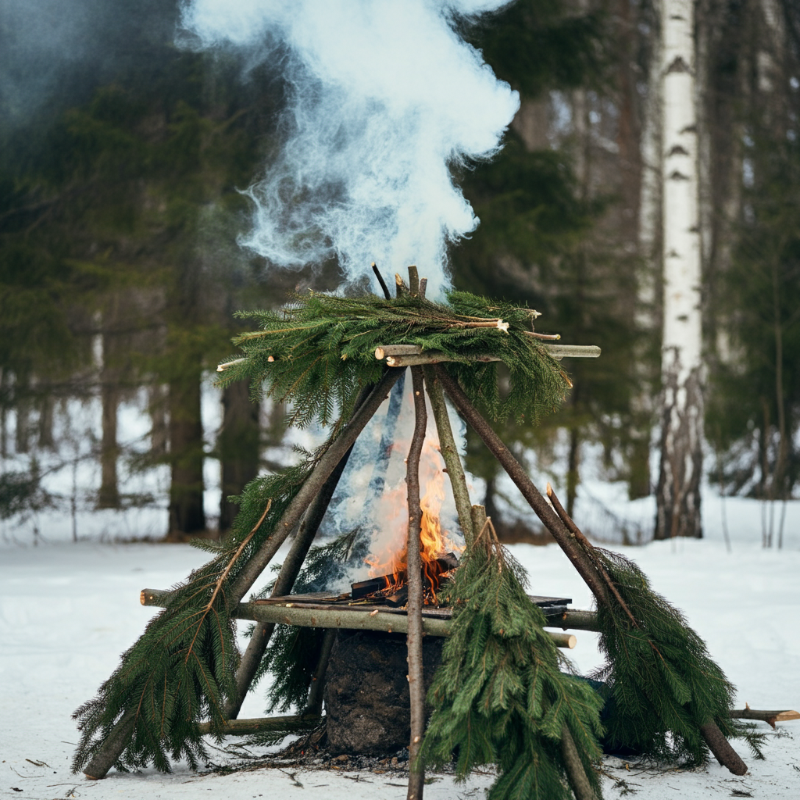
Creating a smoke signal requires preparation and strategy to maximize visibility and efficiency.
What You Need:
- Dry firewood and tinder.
- Green branches or pine boughs.
- Materials to build an elevated platform (tripod, crossbeams, lashings).
- Matches, lighter, or fire-starting tools.
Step-by-Step Instructions:
- Build an Elevated Platform (if possible):
- Construct a tripod using sturdy branches and lash them together at the top.
- Add crossbeams to the tripod and secure them with lashings.
- Lash smaller branches or poles across the crossbeams to create a floor.
- This raised platform keeps your fire above snow or wet ground, ensuring better air circulation and visibility.
- Prepare the Fire Lay:
- On the platform, build a solid fire lay using dry materials, including tinder, kindling, and larger pieces of wood.
- Arrange everything so the fire can be quickly ignited and burn efficiently.
- Add Green Pine Boughs Above the Fire Lay:
- Place green pine boughs or other green vegetation above the fire lay. These will create thick smoke once the fire is lit and reaches the boughs.
- Light the Fire When Needed:
- Ignite the prepared fire lay using dry tinder and kindling.
- Once the fire is strong and producing heat, the green boughs above will catch fire and produce large amounts of smoke.
- If You Can’t Build a Platform:
- Build a good fire lay directly on the ground, making sure to use dry materials.
- Once the fire is burning well, gradually add green pine boughs to produce smoke.
- Maintain a Fire for Quick Smoke Signals (if necessary):
- If your fire-starting skills are not strong, consider keeping a small fire burning at all times.
- This ensures you can quickly add green boughs and produce smoke without delays.
Final Thoughts
Building a winter shelter isn’t just about survival—it’s about tapping into a skill set that connects us to the natural world in a way few other experiences can. Whether you’re hunkered down in a quinzhee, nestled into a snow trench, or improvising with a tarp lean-to, these moments remind us of the incredible power of preparation
and adaptability. The Rockies may be beautiful, but they’re also unpredictable. Having the knowledge and tools to create a safe haven not only helps you stay warm and protected but also gives you the confidence to embrace adventure fully, knowing you’re ready for whatever comes your way.
Winter shelters are as much about resourcefulness as they are about resilience. They test your ability to work with what you have, think quickly, and stay calm under pressure. They’re also a testament to the satisfaction that comes from solving a challenge with your own two hands. Surviving an unexpected night in the wild isn’t just something to endure—it’s something to learn from and, maybe, even enjoy as a story to share later.
What about you? Have you ever had to build a winter shelter or hunker down in unexpected conditions? Share your tales of triumph (or lessons learned the hard way) in the comments below—we’d love to hear your story!
-
Part 1: Winter Survival in the Colorado Rockies — Introduction and Pre-Trip Planning
-
Part 2: Winter Survival in the Colorado Rockies — Must-Have Gear and Clothing
-
Part 3: Winter Survival in the Colorado Rockies — Building and Maintaining a Shelter
-
Part 4: Winter Survival in the Colorado Rockies — Starting Fires in Snowy Conditions
-
Part 5: Winter Survival in the Colorado Rockies — Staying Hydrated in the Winter Wilderness
-
Part 6: Winter Survival in the Colorado Rockies — Navigating and Avoiding Avalanche Danger
Leave a Comment
Winter Survival in the Colorado Rockies — Part 3: Building a Winter Shelter
Because of technology more Americans are heading out into the wilderness, unprepared. With Facebook, Instagram and many other social media platforms at your fingertips, people...
Another Tucking Survival Tip
An easy to follow survival tip. If we tuck our pants into our socks, shirt into our pants, and so on, we trap this warmed...

