Cart
Sub-Total: $0.00
25 min read

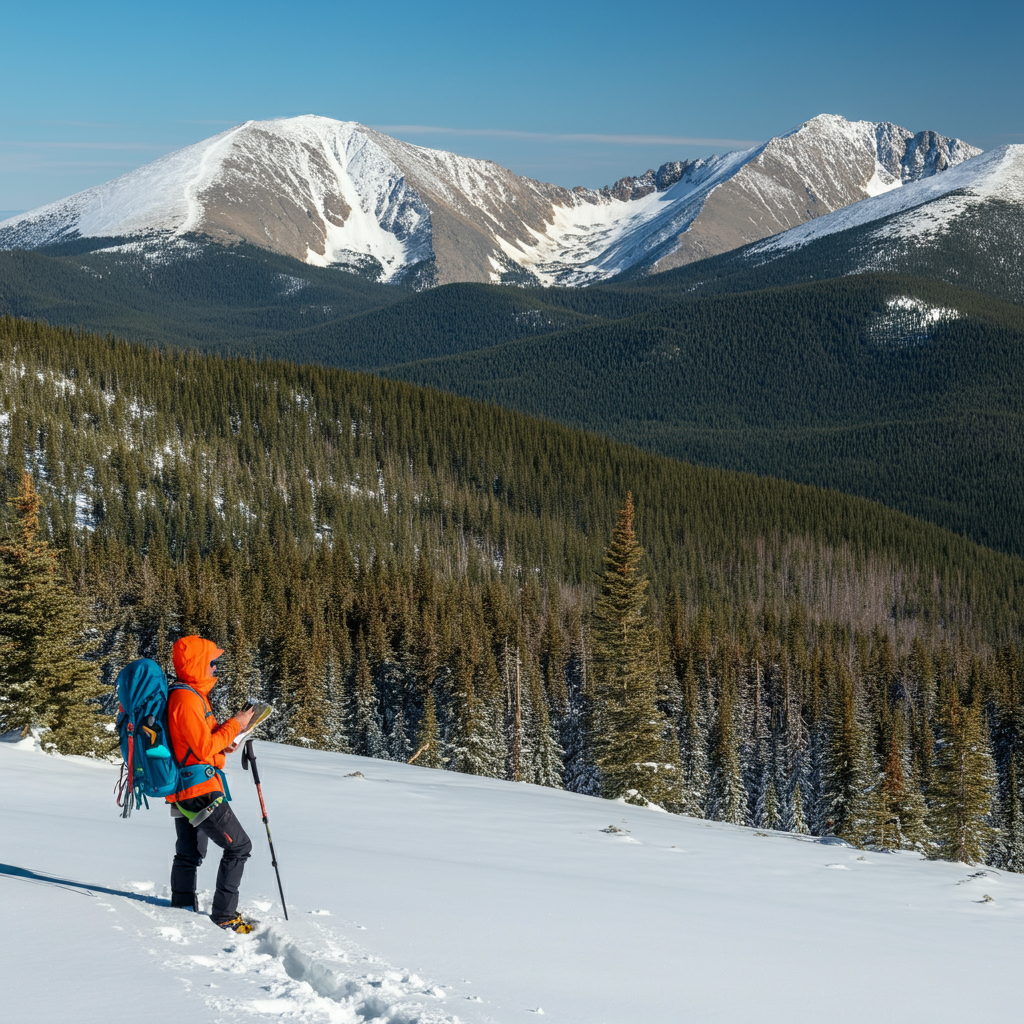
Winter in the Colorado Rockies can make a familiar place feel like somewhere you have never been. A trail you followed easily in July disappears beneath several feet of snow, the rocks you remember are buried, and the junction sign you were counting on is nowhere to be found. Whether you are skiing, snowshoeing, hiking, or heading out with a camera, it is easy to get caught up in the scenery and assume the return trip will be obvious. Then the wind picks up, your tracks start filling in, and you realize that remembering where you came from is not quite the same as knowing how to get back.
The challenge is that winter navigation involves more than finding a trail. You need to understand the terrain around you, recognize where snow changes the hazards, and make decisions while you still have good options. A route that works well in summer might cross an avalanche path in winter, while a tempting shortcut could lead into a steep drainage or over a creek hidden beneath snow. Being physically fit and carrying a good phone will help with some parts of the trip, but neither replaces knowing where you are and evaluating what lies ahead.
In the earlier parts of this series, we covered preparation, clothing, shelter, fire, and water. Those skills support everything we are discussing here because a navigation problem rarely stays just a navigation problem for long. Missing a junction costs time, extra time uses energy, and fatigue and cold can make the next decision harder. In this part, we will look at planning a suitable winter route, keeping track of your position, responding when you lose the trail, and recognizing avalanche exposure before you walk into it.
When choosing a winter outing, look beyond the mileage and the photographs attached to the trail description. A summer trail may cross steep slopes, pass beneath open bowls, or follow a creek through a narrow drainage. Snow can change how you travel through each of those places, and an established trail does not automatically provide a suitable winter route. Study a topographic map of the surrounding area, paying attention to elevation changes, steep terrain above the trail, and locations where you might have difficulty turning around. If you cannot tell whether the route crosses avalanche terrain, get reliable local guidance before committing to it.
Winter access deserves the same attention as the route itself. Seasonal road closures, locked gates, and unplowed parking areas can add substantial distance before you reach the actual trailhead. Check current information from the land manager and make sure the route description you are reading applies to winter travel. A report from August might tell you where the lake is, but it will not tell you whether you can reach the parking area in February. Discovering an extra four miles of walking after you arrive is a poor way to begin a trip you already planned around limited daylight.
Walking through deep snow can turn a modest distance into a demanding outing, especially when you are breaking trail. You also lose time adjusting equipment, managing layers, checking navigation, and stopping to keep the group together. Plan around the conditions and the pace of the slowest person rather than your best summer hiking speed. Set a turnaround time before leaving the trailhead, then reassess it as the day develops. If you are moving more slowly than expected, the answer is usually to shorten the trip rather than borrow time from the return journey.
Leave a useful trip plan with someone who will notice if you do not return. Include the trailhead, intended route, vehicle description, expected check-in time, and what they should do if you are overdue. Discuss any backup destination before leaving, and update your contact if you change plans while you still have service. “We are going somewhere near Breckenridge” leaves an enormous amount of country to search. A clear plan gives that person something concrete to work with and gives you another reason to think through the outing before putting your boots in the snow.
A topographic map helps you see how the landscape fits together instead of reducing the trip to a line between two points. Ridges, drainages, contour lines, and elevation changes help you anticipate what you should encounter as you move. Before starting, identify several recognizable features along the route and think about how you will confirm that you have reached them. A major bend in a valley or the junction of two drainages may remain useful when smaller landmarks disappear beneath snow. The more familiar you are with the route on the map, the easier it becomes to notice when the terrain no longer matches your expectations.
Carry a compass and practice using it with your map before you need it in poor conditions. You should understand how to orient the map, account for local magnetic declination, and follow a bearing while checking the terrain around you. A compass can help you maintain direction, but it does not tell you whether that direction leads across a cliff or through an avalanche path. Keeping the compass packed away until you are already lost also makes learning unnecessarily difficult. Cold fingers, blowing snow, and a worried group are not ideal conditions for figuring out a skill you could have practiced close to home.
A phone or dedicated GPS device can be an excellent navigation aid when you prepare it properly. Download the maps you need, confirm they open without service, and save useful locations such as your parking area, route junctions, and planned turnaround point. Carry backup power, protect electronics from cold and moisture, and learn the functions you expect to use before leaving. The National Park Service recommends practicing with navigation equipment and carrying alternatives when batteries or electronics fail. Having a paper map and compass gives you options when the device you rely on stops cooperating.
Recording your route can help you retrace your travel, but the track still needs interpretation. It shows where you went, not whether the same route remains appropriate after new snow, stronger wind, or reduced visibility. Check the screen against the actual landscape rather than staring at it while walking. If you use a barometric altimeter, compare it with known elevations when possible because changing atmospheric pressure can affect its readings. Each tool provides information, and your job is to combine that information with what you can observe around you.
Good navigation is an ongoing habit rather than something you begin after a wrong turn. Check your position at junctions, changes in direction, and transitions between forest and open terrain. Compare the expected elevation and landforms with what you see, and look behind you occasionally so you recognize the route from the direction you will approach on the return trip. These small checks require little time when conditions are good. They become much harder after the group has traveled another mile, the weather has changed, and everyone has a different opinion about where the mistake happened.
Keep more than one person involved in navigation whenever possible. Other members of the group should understand the intended route and know where the navigation equipment is carried. If the only person following the map becomes injured or their phone fails, the rest of the group should not have to start from scratch. Use stops to confirm your location together and discuss what comes next. That shared awareness also makes it easier for someone to notice a mismatch between the plan and the terrain before the entire group follows it into a problem.
Tracks in the snow can make a route feel reassuring, but they tell you very little about the people who made them. Those travelers may have been heading somewhere else, carrying different equipment, or making their own navigation mistakes. A ski track might lead toward a descent that makes no sense for someone on snowshoes, while footprints could end at an overlook instead of continuing toward your destination. Compare tracks with your map and intended route before following them. The fact that another person went that way is useful information, but it is not enough to make the decision for you.
Your own tracks also have limitations. New snowfall and drifting snow can erase them, and a route that looked obvious on the way out may blend into the surrounding landscape when you return. Avoid making visible footprints your only plan for getting home. Keep track of your position independently and pay attention to changes in wind and snowfall that could affect the return trip. If your confidence depends entirely on being able to see those tracks later, you are already relying on something the weather can take away.
Clouds, fog, and blowing snow can remove the contrast you use to judge distance, slope, and direction. In a whiteout, the ground and sky may become difficult to distinguish, and familiar landmarks can disappear completely. Make decisions while you can still identify your route instead of waiting until the last recognizable feature vanishes. If visibility is declining, consider how difficult the return will become and whether continuing leaves you with a reasonable way back. The National Park Service warns that navigation in these conditions can be extremely difficult and that waiting in a protected location may be safer than continuing and becoming lost.
A GPS position does not remove every problem created by poor visibility. You may know exactly where you are on a map and still be unable to see a steep drop, identify a safe crossing, or judge the slope immediately ahead. If you cannot travel confidently, stop somewhere protected from immediate hazards and reassess the situation. Depending on your location, equipment, and conditions, that might mean returning along a known route or preparing to wait. The decision should come from the terrain and the options available, not from frustration about losing time.
When you realize that you do not know where you are, stop moving long enough to solve the problem. Get the group together, add clothing before you become chilled, and identify your last confirmed location. Compare the map, GPS position, recorded track, elevation, and surrounding terrain. Take care of simple needs such as food and water while you assess the situation, especially if the group has been pushing hard. Continuing because the trail must be “just over there” can turn a manageable mistake into a much larger search for familiar ground.
Focus on evidence rather than confidence. Ask what tells you that a particular drainage, ridge, or junction is the one you think it is, and be willing to reject an explanation that does not fit the map. Someone speaking with certainty may still be wrong, including the most experienced person in the group. If the information conflicts, work through that conflict before choosing a direction. A few minutes spent checking a position can prevent an hour of unnecessary travel and keep the group from becoming more tired, cold, and committed to the wrong route.
Returning to your last known location can be a good choice when you can identify the route and travel it safely. That does not mean blindly following a bearing or walking toward a waypoint regardless of what lies between you and it. Avoid shortcuts through unfamiliar terrain, particularly steep drainages or snow-covered creek corridors. The advice to follow a stream downhill can lead you toward waterfalls, hidden water, narrow gullies, and other hazards. Choose a route because you understand where it goes and what it crosses, not because downhill feels like progress.
If you cannot establish a safe route out, shift your attention toward shelter, warmth, communication, and keeping the group together. Choose a location away from avalanche exposure and other immediate hazards, then use the equipment and skills discussed earlier in this series. Contact help before the situation deteriorates beyond your ability to manage it. A satellite communicator may provide an option where cell service is unavailable, but requesting help does not guarantee a quick arrival. Weather, terrain, and access still affect the people coming to reach you, which is why your ability to care for yourself remains part of the plan.
You do not have to be skiing a steep mountain face to encounter avalanche danger. Hikers and snowshoers can enter avalanche paths while following trails that appear relatively gentle. An avalanche path includes the slope where the slide begins, the terrain it travels through, and the area where the debris stops. Some paths form obvious open corridors through trees, while others involve smaller slopes or terrain features that are easy to overlook. Looking only at the ground beneath your feet leaves out the slopes above you and the snow that could reach your location.
Think about this when choosing places to stop, eat, adjust equipment, or build a shelter. A flat clearing may feel comfortable while sitting directly beneath a steep bowl, and the bottom of a drainage may collect debris from several slopes. Evaluate the whole setting before deciding that a location offers protection. The question is not simply whether the spot where you are standing could slide. You also need to consider whether an avalanche could start somewhere else and travel through it.
Most slab avalanches begin on slopes between approximately 30 and 50 degrees, but the moving snow can continue onto much gentler terrain below. This is why choosing low-angle ground requires more thought than checking the slope immediately under your feet. Terrain well below 30 degrees provides a more conservative option when it is also separated from steeper slopes and avalanche runouts. A gentle trail directly beneath a steep slope still leaves you exposed to an avalanche from above.
Topographic maps and slope shading can help identify potential exposure during planning, but they cannot represent every small roll or steep feature with perfect accuracy. Compare the map with what you see, and do not walk onto a questionable slope simply to measure it. If you do not yet have the skills to recognize avalanche terrain, get local guidance and choose an outing that avoids that exposure. There is plenty to enjoy in winter without making your first lesson in slope assessment happen halfway through a route you already feel committed to finishing.
Terrain traps increase the consequences of being caught in an avalanche. Gullies and creek beds can collect deep debris, while cliffs, trees, and rocks create additional opportunities for severe injury. A relatively small slide can become deadly if it carries someone into one of these features or buries them deeply in a confined space. When looking at a slope, consider the entire path of a potential avalanche and what lies at the bottom. The size of the slope alone does not tell you how serious the outcome could be.
This is another reason to avoid treating trees as automatic protection. A wooded area may still contain avalanche terrain, and trees can become obstacles if moving snow carries a person through them. Use the terrain, forecast, and your observations together rather than deciding that one reassuring feature settles the question. When the consequences of a mistake are severe, give yourself more room to avoid the exposure instead of trying to justify passing through it.
Before heading out, check the Colorado Avalanche Information Center for the area and date of your trip. Read the full forecast, including the avalanche problems, affected elevations, slope directions, expected size, and travel advice. The term “aspect” means the direction a slope faces, so a forecast identifying a problem on north-facing slopes is describing terrain you need to recognize on your map and in the field. An avalanche forecast covers a geographic area over a specified period and supports your decisions, but it does not certify an individual slope as safe.
The danger scale has five levels: Low, Moderate, Considerable, High, and Extreme. Those ratings summarize the likelihood, size, and distribution of expected avalanches, and they need to be read alongside the detailed guidance. Moderate does not mean that every slope presents a modest risk, and Considerable describes dangerous conditions requiring conservative decisions. At High danger, travel in avalanche terrain is not recommended, while Extreme calls for avoiding avalanche terrain entirely. A lower number should never replace evaluating the particular terrain you plan to enter.
Some avalanche problems remain after the snowfall ends and the weather becomes pleasant. Persistent weak layers can stay buried within the snowpack and allow avalanches to release long after a storm. Under these conditions, a person may also trigger a slide from a distance, including from below the slope that releases. When the forecast identifies this problem, follow the terrain avoidance advice and give suspect slopes a generous margin. Sunshine, old tracks, and a quiet surface do not establish that the underlying snowpack has become stable.
This is where familiarity can work against you. You may have crossed the same area many times without a problem, but those earlier trips took place under different conditions. Use that experience to recognize terrain rather than to dismiss the current forecast. A familiar route still needs a fresh evaluation, and choosing a different destination may be the most useful adjustment you make all day. The purpose of checking conditions is to let them influence the plan, even when that means giving up the route you originally wanted.
Recent avalanches provide direct evidence that the snow has been unstable, while cracks extending outward from your skis or snowshoes are another warning. A sudden settling sensation or a hollow “whumpf” can indicate that a weak layer has collapsed beneath the surface. Treat these observations as reasons to reassess your exposure rather than interesting details to mention later. You do not need every warning sign to appear before changing the plan, and continuing toward steeper terrain to investigate is not a reasonable response to evidence of instability.
Weather can provide additional warnings. Heavy snowfall adds weight to the snowpack, wind moves snow into drifts, and rain or rapid warming can increase instability. Watch for blowing snow and fresh loading, avoid cornices and the terrain beneath them, and compare the conditions you encounter with the forecast you read. Persistent avalanche problems can remain after the obvious weather signals disappear, so the end of a storm does not necessarily mean the end of the hazard.
A useful plan includes the possibility that you will change it. If the wind is stronger than expected, visibility is falling, or you observe signs of unstable snow, reassess before moving farther into exposed terrain. The forecast provides a starting point, while your observations help you understand what is happening where you are. Neither should be used selectively to defend a route you have already decided to take. When the evidence becomes more concerning, reduce the exposure rather than searching for a reason to continue.
The absence of obvious warnings also deserves careful interpretation. Not seeing a recent avalanche or hearing a collapse does not prove that a slope is stable. Your ability to recognize conditions has limits, particularly without formal avalanche education and experience. A conservative route gives you more room for uncertainty, while a complicated route demands more from your judgment. Match the outing to what you can reliably assess, not to what you hope will turn out fine.
A group makes better decisions when everyone can speak up without being embarrassed or pressured to continue. Before starting, agree that concerns about conditions, navigation, pace, or physical comfort deserve attention. During the trip, ask specific questions and make space for honest answers. Someone who is struggling may not volunteer that information if the rest of the group keeps talking about how close the destination is. Checking in early can reveal a problem while you still have straightforward options for dealing with it.
Do not assume the quietest person is doing well or that the most confident person has assessed everything correctly. One person may notice blowing snow above a ridge while another realizes that the return trip will take longer than planned. Share those observations and compare them with the route and forecast. Group awareness is useful only when the information reaches the people making decisions. Letting one enthusiastic person pull everyone forward can hide concerns that would have changed the plan if they had been discussed.
A long drive, a rare day off, or an expensive set of new skis can make turning around frustrating. Those investments are real, but they do not improve the snowpack or create more daylight. The same applies when you are close to a lake or summit and feel that stopping would waste the effort already spent. Evaluate what it will take to continue and return from your current position. The energy you used getting there is already gone, and the conditions ahead deserve a decision based on what is happening now.
Choose a worthwhile alternative when possible, such as a shorter route or terrain with less exposure. That flexibility is easier when you discuss backup options before leaving home instead of trying to invent them after disappointment sets in. Sometimes the best available choice is simply to return to the vehicle. A trip that ends early can still involve good navigation, sound judgment, and time outside. Those are useful outcomes even when they do not produce the photograph you planned to bring home.
For travel in avalanche terrain, each person needs an avalanche transceiver, probe, and sturdy metal shovel, along with practiced skills in using them. The transceiver helps locate a buried person, the probe helps pinpoint the burial location and depth, and the shovel allows companions to excavate. Sharing one rescue kit among several people creates obvious problems if the person carrying it is the one buried. Everyone should understand their own equipment, carry it appropriately, and complete the necessary function checks before entering exposed terrain.
Do not confuse other communication or search technology with a companion rescue transceiver. A satellite communicator can request outside assistance, but it does not perform the same job as a transceiver search for a buried partner. Likewise, a RECCO reflector built into clothing is designed for use with specialized detection equipment and does not replace an avalanche transceiver for companion rescue. Understand what each device can do before relying on it, particularly when a product name or feature sounds more capable than it is in your situation.
Take an avalanche education course and a dedicated rescue course before undertaking travel in avalanche terrain. Introductory awareness can help you recognize exposure and choose places to avoid, while more involved backcountry travel requires skills in planning, terrain assessment, decision-making, and rescue. Avalanche.org describes Level 1 and companion rescue courses as foundations for developing those abilities. Training gives you a place to practice with feedback rather than trying to work out unfamiliar procedures during an actual emergency.
Continue practicing with your partners and actual equipment after the course. Knowing the broad steps is different from performing them efficiently while wearing gloves, dealing with stress, and moving through deep snow. Familiarity with equipment also helps reveal problems before a trip, such as a shovel that is difficult to assemble or controls someone does not understand. Rescue preparation supports your ability to respond when something goes wrong, but it should never become the reason you accept terrain or conditions you would otherwise avoid.
If someone is caught, watch their movement and identify the point where you last saw them. That observation can help direct the search, but rescuers also need to evaluate whether another avalanche threatens the debris or the approach. A burial is an immediate emergency, and the group must organize quickly without creating additional victims. Activate outside assistance as soon as practical while arranging companion rescue so that communication does not unnecessarily delay the search. The right division of tasks depends on the number of people available and the circumstances.
Companion rescue generally involves a transceiver search, probing to pinpoint the buried person, and organized shoveling to reach them. Once uncovered, the person may require airway support, first aid, protection from the cold, and evacuation. These are skills to learn and rehearse in practical training because the emergency itself provides very little room for figuring things out. Avalanche.org emphasizes both the urgency of companion rescue and the need to assess additional avalanche threats before entering the scene.
Finding and uncovering a buried person does not necessarily end the emergency. Injury, cold exposure, damaged equipment, and difficult terrain may leave the group unable to travel without help. Your clothing, shelter, first aid supplies, communication plan, and ability to manage the situation remain important after the search. This is one reason the subjects in this winter series belong together rather than being treated as separate tricks. Navigation, preparation, shelter, and medical skills all support your ability to respond when the original plan falls apart.
The more effective approach is to recognize exposure early enough to avoid being caught. Rescue equipment and training deserve attention, but so do the quieter decisions made at home, at the trailhead, and before entering questionable terrain. Choosing a different route rarely looks dramatic, which can make it easy to overlook how much that decision accomplishes. Avoiding the emergency is a successful use of your knowledge, even when nobody else sees it happen.
Before starting, take a few minutes to confirm that everyone understands the route, turnaround time, and backup option. Make sure offline maps work, navigation backups are available, and your equipment matches the weather and terrain. Check that someone at home has your plan, and confirm that the group has enough clothing, food, water, lighting, and emergency shelter for an unexpected delay. If the trip involves avalanche terrain, appropriate training, individual rescue equipment, and transceiver checks belong in that preparation. Finding a missing piece beside the vehicle gives you a chance to fix it or change the outing.
As the day develops, keep comparing the plan with what is actually happening. Notice whether travel is slower than expected, whether the weather is changing, and whether everyone is still functioning well. Check your location before uncertainty becomes confusion, and evaluate the slopes around you before stepping into their paths. These habits do not require treating every winter outing like a disaster waiting to happen. They let you enjoy the trip while staying aware of when the conditions call for a different decision.
The Colorado Rockies offer plenty of reasons to get outside in winter, from quiet forest trails to mountain views that make the cold walk worthwhile. Enjoying those places starts with understanding that snow changes both the route and the consequences of a mistake. Learn your navigation tools, study the terrain, read the avalanche forecast, and choose an outing that fits the group’s abilities. Give yourself enough time and flexibility to respond when the day turns out differently than expected.
You do not need to reach every destination to have a worthwhile trip, but you do need the judgment and energy to get everyone back. Pay attention, share what you notice, and be ready to change plans while you still have good options. In Part 7, we will look at preventing and responding to cold-weather injuries, including how to recognize when cold is beginning to affect someone’s ability to function. If snow has ever hidden a familiar trail or forced you to rethink a route, share what you learned in the comments. Your experience may help another person recognize the same situation before it becomes an emergency.
For related reading on snowpack, terrain, and avalanche risk, see How to Survive an Avalanche. For broader preparation for cold conditions, read Mastering Winter Wilderness Survival.
The August 2026 Grand Canyon flash flood exposes the limits of familiar campsites, warning systems, and last-minute escape plans. Jason Marsteiner’s original analysis is followed...
Most group failures in the backcountry do not start with a single bad decision. They begin much earlier, when communication, alignment, and shared responsibility quietly...
Nash Quinn vanished on a routine ride near Laramie. His story is a powerful reminder of why preparation, communication, and humility in the outdoors matter...
When you’re heading into the winter wonderland of the Colorado Rockies, the last thing you want is for your adventure to turn into a survival...
The first best way to survive an avalanche is to understand what causes them to occur. This will allow you to recognize an avalanche area...